Overview
This manual covers how to use the Church Management Platform application—from account creation and family management through admin features like event scheduling, kiosk check-in, and registration forms.
For a general introduction to the system and its capabilities, see the main documentation page. The system is accessed at https://checkin.ilheureux.dev.
User Roles
Each user account has one assigned role that determines what they can see and do.
| Role | Description | Key Permissions |
|---|---|---|
| ADMIN | Full system administrator | All features: kiosk management, event/group/form CRUD, family verification, visitor assignment, people search by phone/email |
| STAFF | Church staff member | Same as Member (additional permissions planned) |
| MEMBER | Regular church member | View own family, browse groups, view events, check-in history, form registration, name-only people search |
Creating an Account
There are two ways to create an account:
Option A: Email Registration
- Navigate to the login page and click Register.
- Fill in your First Name, Last Name, Email, Phone, and Password. Your phone number will auto-format as you type (e.g.,
(805) 555-1234). - Click Register. You will be directed to the phone verification page.
Option B: Google Sign-In
- On the login page, click the Sign in with Google button.
- Select your Google account. An account will be created automatically on first sign-in.
- You will be asked to enter your phone number on the Complete Profile page before proceeding.
Logging In
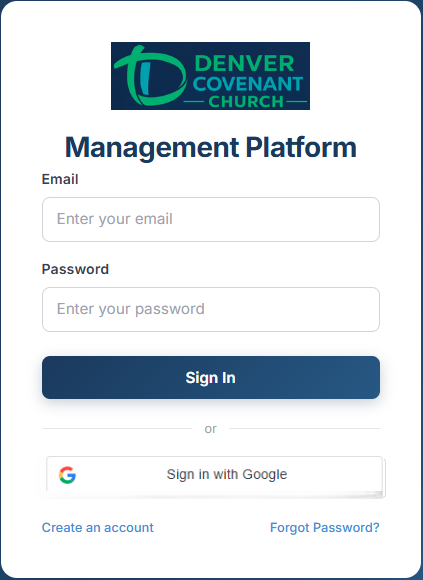
Enter your email and password, or click Sign in with Google.
After a successful login:
- If your phone is not yet verified, you’ll be redirected to the verification page.
- Member users land on the Family page.
- Admin users land on the Home / Dashboard page.
Forgot Password
- Click Forgot password? on the login page.
- Enter your email address. A reset link will be sent to your inbox.
- Click the link in the email and set a new password. The link expires after 1 hour.
Phone Verification
After registering or completing your profile, you must verify your phone number via a 6-digit SMS code.
- A verification code is sent to your phone automatically.
- Enter the 6-digit code on the Verify Your Phone page.
- Click Verify. On success, you’ll be taken to the app.
- Codes expire after 10 minutes.
- Click Resend Code if you didn’t receive it (limited to one code per minute).
Home / Dashboard
The Home page has a tabbed layout with the following tabs:
Welcome Tab
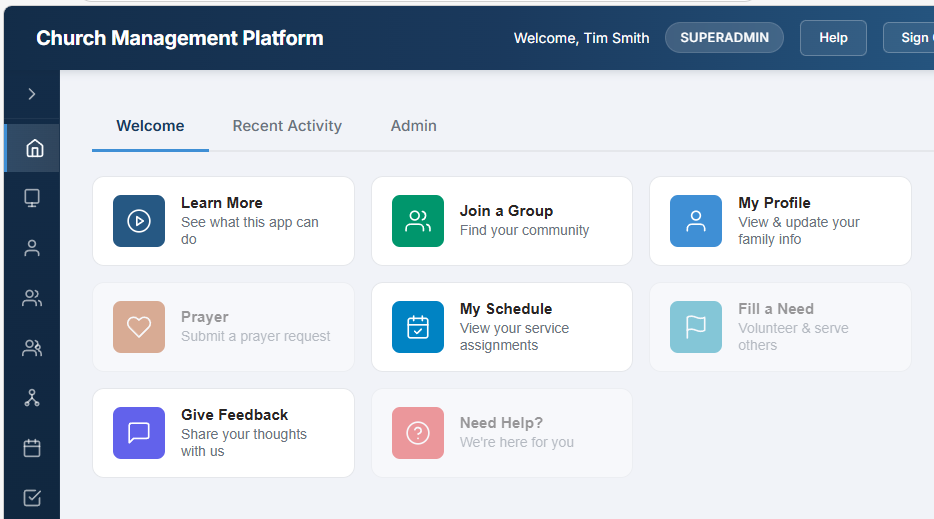
A grid of quick-action cards for common tasks:
- Learn More — opens the platform documentation
- Join a Group — browse and join small groups
- My Profile — view and edit your family information
- My Schedule — view your service team assignments
- Give Feedback — submit feedback, feature requests, or bug reports to administrators
- Need Help? — opens the platform documentation
Below the action cards, two information panels are displayed:
- Upcoming Events — the next 7 events within 30 days, with date, time, location, and a link to the full calendar
- Church Info — service times, address, and website from your church’s branding configuration
Admin Tab Admin Only
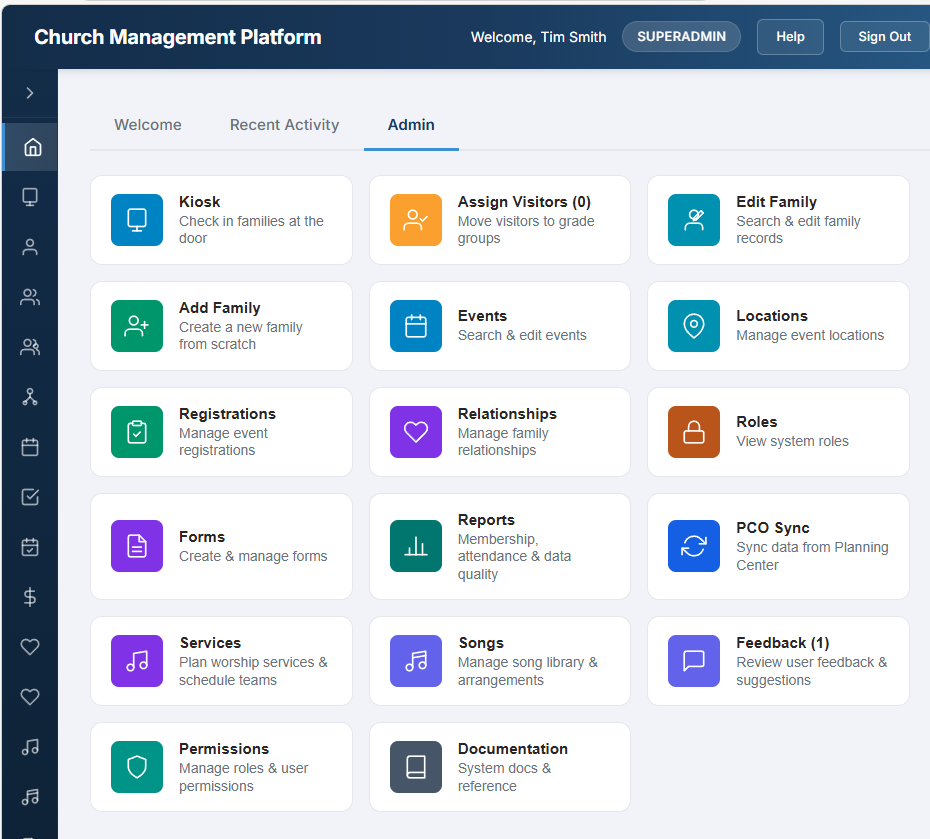
A grid of administrative action cards:
| Tile | Description |
|---|---|
| Kiosk | Open the admin kiosk for search-based check-in |
| Edit Family | Search people to find and edit a family |
| New Families (N) | Review and verify newly registered families. Count shows unverified families |
| Events | Create and manage events |
| Locations | Manage event locations |
| Registrations | Manage event registrations |
| Forms | Build registration forms with custom fields |
| Relationships | Manage family relationship types |
| Roles | View system roles |
My Family
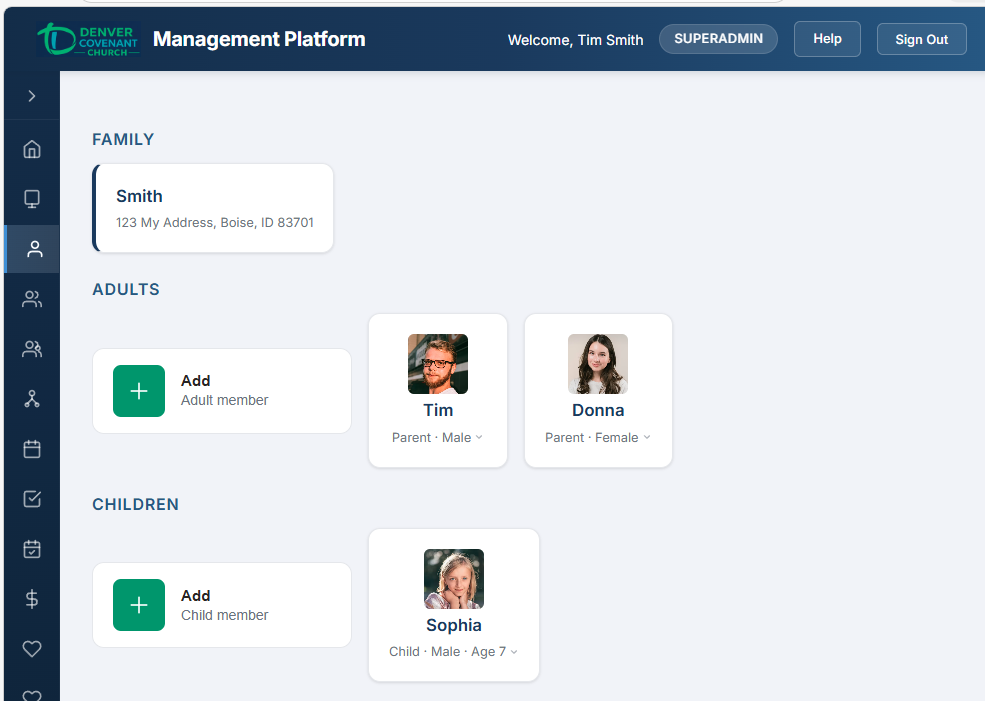
The Family page displays all families you belong to, organized into three rows of tiles:
Families Row
- Shows each family as a tile with the family name and full address.
- Click a family tile to edit the family name or address.
- Click + Add Family to create a new family.
Adults Row
- Displays parents, guardians, spouses, and grandparents with a photo avatar, their relationship, and gender (e.g., “Parent · Male”).
- Click a person tile to edit their details (name, date of birth, gender, allergies, photo).
- Click + Add Adult to add an adult family member.
Children Row
- Displays children with a photo avatar, name, gender, and age (e.g., “Child · Male · Age 4”).
- Click a child tile to edit their details.
- Click + Add Child to add a child. Date of birth is required for children.
Editing a Person
The edit form includes:
- Photo — click the avatar to upload a photo (JPG, PNG, or WebP, max 5 MB). The photo appears immediately after upload.
- First Name and Last Name (required)
- Date of Birth (required for children)
- Gender — Male or Female radio buttons
- Allergies — comma-separated list (shown in red on check-in labels)
Creating a Family (Admin)
Admins see a guided two-phase creation flow:
- Phase 1 — enter the parent’s first name, last name, email, phone, and gender. This creates a new person, family, email, and phone all at once.
- Phase 2 — add children one at a time (first name, last name, DOB, gender, allergies). Click Add Child for each. Click Done when finished.
Creating a Family (Member)
Members see a simpler form: enter a family name and address. The current user is automatically added as a parent.
People Search
Search for people in the church directory. Type at least 2 characters to begin searching.
| Role | Search By | Results Show |
|---|---|---|
| Member | Name only | Name |
| Admin | Name, phone number, or email | Name, email, phone |
Admin: clicking a person in the search results opens their family page for viewing and editing.
My Groups
Displays a list of all church groups you’re a member of. Each row shows:
- Group photo (or default placeholder)
- Group name with a Leader badge if you are a leader
- Type and department
- Leader names
- Join rule badge — green “Open to All” or yellow “Invitation or Request Required”
- Communication badge — blue “Members Interact” or purple “Announce Only”
Small Groups
Browse and discover small groups such as Bible studies, men’s and women’s groups, and serving teams.
Browsing
- Use the search bar to filter groups by name.
- Use the Area and Type dropdowns to narrow results.
- Groups appear as cards in a responsive grid showing: photo, name, member count, leader, type, meeting schedule, area, and childcare availability.
- Click a card to view full details in a popup.
- Groups created within the last 6 months display a yellow New Group badge.
Joining a Group
- Open to All groups — click Request to Join (the leader is notified by email).
- Invitation or Request Required groups — click Request to Join. The group leader will approve or deny your request.
- View your request statuses under My Requests.
Messaging a Leader
Click the envelope icon next to a group name to open the Message Leader form. Enter a subject (up to 50 characters) and your message. The email is sent to all active leaders of the group, with your email as the reply-to address.
Events Calendar
A monthly calendar view of church events.
Navigation
- Use the date picker (top left) to jump to any month.
- Click Today to return to the current month.
- Use the < and > arrows for previous/next month.
Calendar Display
- Today is highlighted with a light blue background and a blue circle on the day number.
- Events appear as text lines in each day cell: blue for group-based events, green for events you’re registered for.
- When multiple events share the same name on a day, they’re grouped with a count (e.g., “[8] Sunday Kids Ministry”).
Day Detail Panel
Click any day cell to open a detail panel below the calendar showing a table with columns: Time, Event, Location, and Group. Click a row to see full event details in a popup.
What You See
| Role | Events Shown |
|---|---|
| Admin | All events (with a search bar to filter by name) |
| Member | Events you’re registered for, or events linked to groups you belong to |
Check-In History
View recent check-in records. Three tabs are available:
Family Tab (Default)
Shows check-ins for you and all your family members. Columns: Person (with a “you” badge for your own), Event, Date, Time, and Security Code (green monospace badge).
Just Me Tab
Shows only your own check-ins (same columns, without the Person column).
All Tab Admin Only
A monthly calendar view of all check-ins across the church:
- Days with check-ins are colored light green with a count badge.
- Click a green day to see the full check-in table with 11 columns: Family, Parent 1, Parent 2, Phone, Child, Age, Group, Event, Location, Code, Time.
- Click ◄ Calendar to return to the monthly view.
Form Registration
When you receive an email invitation to register for an event or program, the email contains a Register Now link that takes you to the registration page.
Registration Steps
- Select events — if the form allows individual event selection, click event rows to select or deselect them (all are selected by default). If it’s a package deal, all events are shown as a non-selectable schedule.
- Select family members — click on adult and child tiles to select who will attend. A selected tile shows a blue border.
- Complete required info — if any selected person is missing required information (e.g., date of birth, email, phone), a red “!” badge appears on their tile. Click the tile to expand an inline editing panel where you can fill in the missing data.
- Fill in custom fields — if the form has additional questions (text, dropdowns, checkboxes, etc.), fill them in for each selected person in the “Additional Information” section.
- Click Register N People to submit. A summary shows how many people were registered and for how many events.
Admin Features Overview
Admin users have access to additional management tools available via the Dashboard’s Admin tab and the sidebar. This section covers each admin capability in detail.
Admin Kiosk Admin
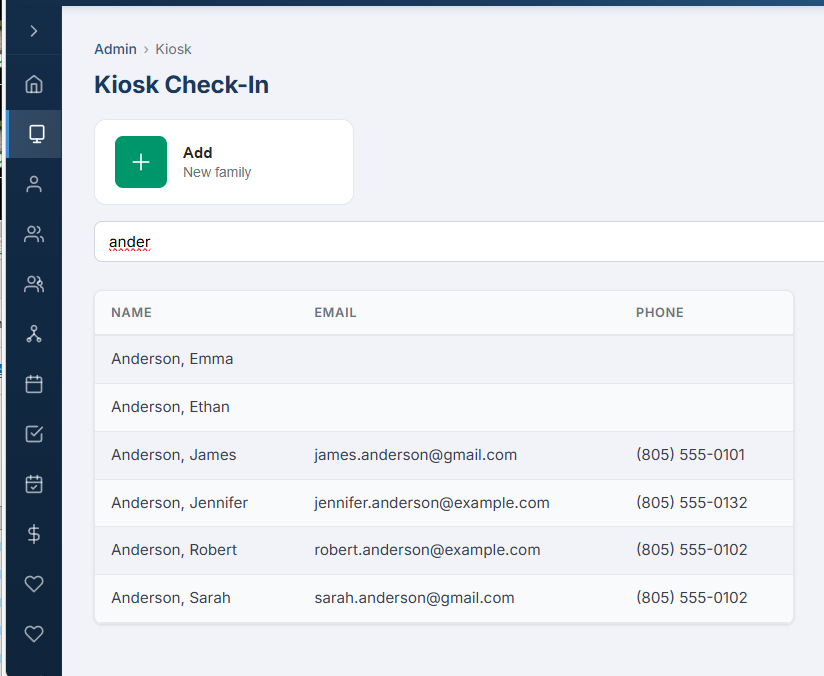
The admin kiosk provides a search-based check-in flow for staff use, accessed from the sidebar or Dashboard Admin tab.
Search & Select
- Type a name, phone number, or email into the search box (2-character minimum).
- Click a person in the results to open their family check-in page.
Check-In Page
The check-in page shows one row per family member with person info on the left and selectable event tiles on the right.
- Event tiles show the event time, name, and group name. Click a tile to select that person for that event.
- People with exactly one available event are auto-selected on page load.
- Already checked-in people show a green tile with their security code.
- Click Check In (N) to check in all selected people. Labels are printed automatically.
Family Actions Menu
The dropdown menu (top right) offers:
| Action | Description |
|---|---|
| Authorized People | Manage who is authorized to pick up children from this family |
| Edit Family | Navigate to the full family editing page |
| Add Check-in Message | Coming soon |
| Reprint Labels | Reprint labels for all currently checked-in family members |
Authorized Pickup
The Authorized People modal lets you search for and add people who are authorized to pick up children from this family. Added people appear as chips between the Adults and Children rows on the check-in page.
Add Family
The + Add Family tile at the top of the search page opens the guided family creation flow. After creating the family, you return to the kiosk search.
Family Verification Admin
When new families register, they default to “unverified.” The Dashboard Admin tab shows a New Families tile with the count of unverified families.
Verification Flow
- Click the New Families tile on the Dashboard Admin tab.
- You enter verify mode, stepping through one unverified family at a time with a progress indicator (“Family 1 of N”).
- Unverified tiles (family or person) appear with a pink background and a green Verify button.
- Click Verify on each tile to mark it as verified. The tile turns white and the button disappears.
- Click Next to advance to the next family.
- Click Cancel to exit verify mode and return to the Dashboard.
Event Management Admin
Manage all events from the Events admin page (Dashboard Admin tab → Events, or sidebar Events → click “Edit Event” on any event).
Creating an Event
- Click + Add New.
- Enter the Name, select a Location (optional), select a Church Group (optional — links the event to a group for kiosk auto-check-in), and set the Start Time.
- Choose the Event Type:
- Single Event — creates one event.
- Recurring — select a pattern (Daily, Weekdays, Sundays, Weekly, Bi-Weekly, Monthly) and either a number of occurrences or an end date.
- Click Create Event.
Editing an Event
Click any event in the list to open the edit form. You can change the name, location, church group, form, and start time.
Recurring Event Series
When editing an event that belongs to a recurring series:
- A Series Info box shows the pattern, event count, and date range.
- Extend Series — add more occurrences by count or end date.
- Trim Series — remove all events after a specified date.
- Saving name/location changes prompts: “Apply to this event only” or “All events in series.”
Event Attendance
In edit mode, an Attendance section lets you search and add people, view the attendee roster with avatars, add notes, and save.
Registration Management Admin
Manage who is registered for upcoming events.
Viewing Registrations
The left panel lists upcoming events (future dates only). Click an event to see the registration list on the right, showing each person with their avatar, name, and registration date.
Registering Individuals
In the “Register Individual” section, search for a person and click their name to register them for the selected event.
Bulk Registering a Group
In the “Register Group” section, select a church group from the dropdown and click Register All Members. The system shows how many were registered and how many were skipped (already registered).
Unregistering
Click the red × button next to a person to remove their registration.
Locations Admin
Manage the list of locations used by events (e.g., “Main Sanctuary,” “Room 201”).
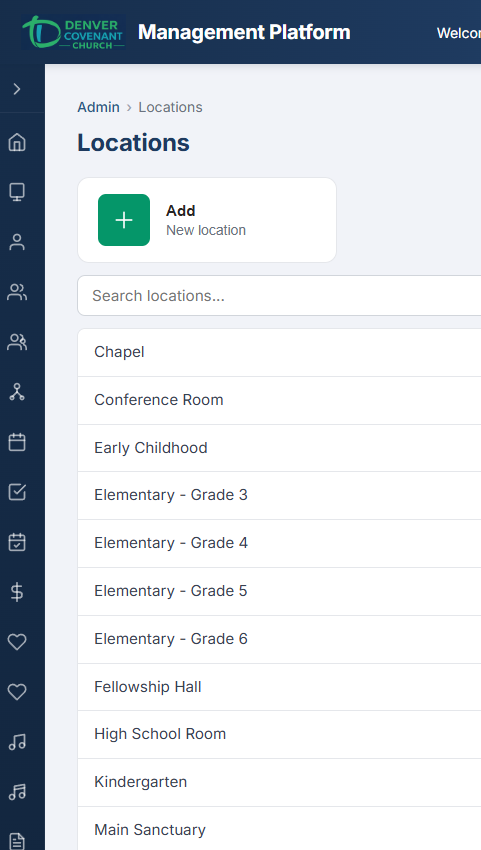
The Locations page — searchable list on the left, edit form on the right.
- Left panel: list of location names with search. Click to select.
- Right panel: edit the name, or add a new location.
Church Groups Admin
Manage the church’s organizational hierarchy using a Department → Group two-level structure.
Tree View
- Departments are top-level items (blue Dept badge). Click the arrow to expand/collapse.
- Groups are nested under departments (green Group badge).
- Use the search box to filter the tree. Matching nodes auto-expand.
Adding Groups
Context-sensitive add buttons appear based on your selection:
- + Department — always visible
- + Group — visible when a department is selected
Editing a Group
Select a group in the tree to open the edit form with: Name, Code (auto-generated), Description, Group Type, Join Rule, Communication Type, Active/Inactive, and Sort Order.
Managing Members
For level-3 groups (actual groups, not departments), a Members section appears:
- Members shown in a compact 4-column grid with name, leader toggle (gold star), and remove button.
- Search and add people using the search box at the bottom.
- Toggle the star icon to promote or demote a member as a leader.
Small Group Administration Admin
Admins see additional controls on the Small Groups browse page.
Creating a Small Group
- Click + Add Group.
- Fill in: Name, Description, Type (Men, Women, Married, Family, Mixed, etc.), Meeting Day, Meeting Frequency, Meeting Time, Area of Town, Childcare, Sort Order, Public/Private toggle.
- Upload a group photo (optional).
- Add leaders by searching for people and selecting a leader type (Leader, Coach, or Other).
- Click Save.
Editing a Small Group
Click Edit on any group card. The edit panel includes all fields from creation plus:
- Active/Inactive toggle
- Join Requests section — list of pending join requests with Approve and Deny buttons
Form Builder Admin
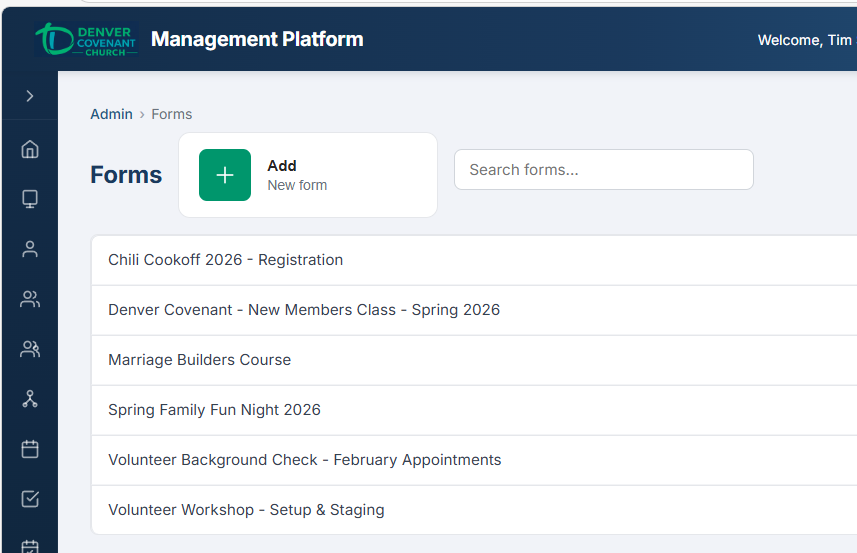
Create registration forms linked to events, build recipient lists, and send email invitations.
Creating a Form
- Click + Add New in the left panel.
- Enter the Title and optional Description.
- Select Required Fields by checking which person fields are mandatory: DOB, Gender, Allergies, Email, Phone, Mailing Address.
- Optionally add Required Fields by Role to require different fields for Registrants, Spouses, or Children.
- Build Custom Fields (see below).
- Check Register for series if registration should cover all linked events as a package (no individual event selection).
- Click Save.
Custom Field Types
| Type | Description | User Input? |
|---|---|---|
| Text | Single-line or multi-line text input (small/medium/large) | Yes |
| Dropdown | Select from a list of options | Yes |
| Checkbox | Yes/no toggle | Yes |
| Radio Button | Select one from a list of options | Yes |
| Slider | Range slider with labeled tick marks | Yes |
| Number Stepper | Increment/decrement number control | Yes |
| Header | Section heading (display only) | No |
| Info Text | Informational paragraph (display only) | No |
| White Space | Empty spacer for visual separation | No |
Input fields can be marked as Required with a checkbox.
Linking Events
In edit mode, the Linked Events section lets you search for events and link them to the form. Linked events appear as the selectable event list on the registration page. Unlink events with the × button.
Managing Recipients
The Recipients section lets you build the invitation list:
- Select a church group from the dropdown to bulk-add all active members.
- Use the person search to add individuals.
- Remove individual recipients with ×, or click Remove All to clear the list.
Sending Invitations
Click Send Invitations to email all recipients. Each email includes the form title, description, linked event schedule, and a “Register Now” button linking to the registration page. A summary shows how many were sent and how many were skipped (no email on file).
Viewing Submissions
When custom fields exist, a Submissions section shows a table of all responses: person name, each custom field answer, and submission date.
Sharing the Registration Link
Click the link icon next to any form in the list to copy the registration URL to your clipboard. Share this link directly with people who should register.
Visitor Assignment Admin
When first-time visitors check in, children are placed in temporary visitor groups. The Visitor Assignment page lets you move them to their correct grade-level group.
Using the Page
- Select a date using the date picker (defaults to today).
- Each row shows a visitor child with their photo, name, age, allergies, family info, current visitor group (amber badge), and check-in details.
- Select the target group from the dropdown (filtered to appropriate grade-level groups based on the visitor category).
- Click Assign. The child is removed from the visitor group and added to the target group. The row fades green and disappears.
The Dashboard Admin tab shows an “Assign Visitors” tile with the total count of unassigned visitors (across all dates).
Roles Admin
A read-only list of the system’s 7 roles: ADMIN, STAFF, EVENT_COORDINATOR, CHECKIN_ADMIN, GROUP_LEADER, VOLUNTEER, MEMBER. Roles are system-defined and cannot be created or edited from the UI.
Permission Management Admin
The Permission Management page provides a role-permission matrix and per-user overrides. Admins can view the default permissions for each role, toggle individual permissions per user, and assign roles.
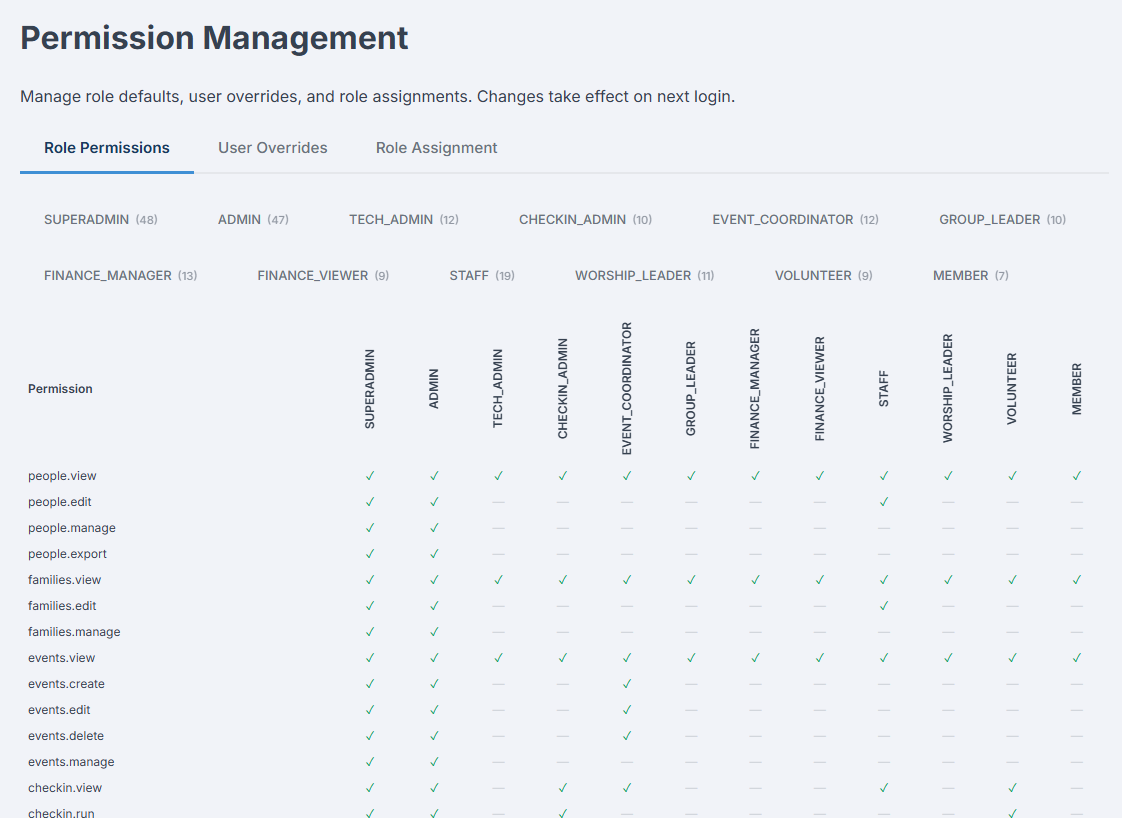
The Permission Management page — role-permission matrix with user override controls.
Feature Modules Admin
The Feature Modules page lets administrators enable or disable optional platform modules. Each module can be toggled on or off with a switch, and the change takes effect immediately across the platform (sidebar, routes, and API endpoints).
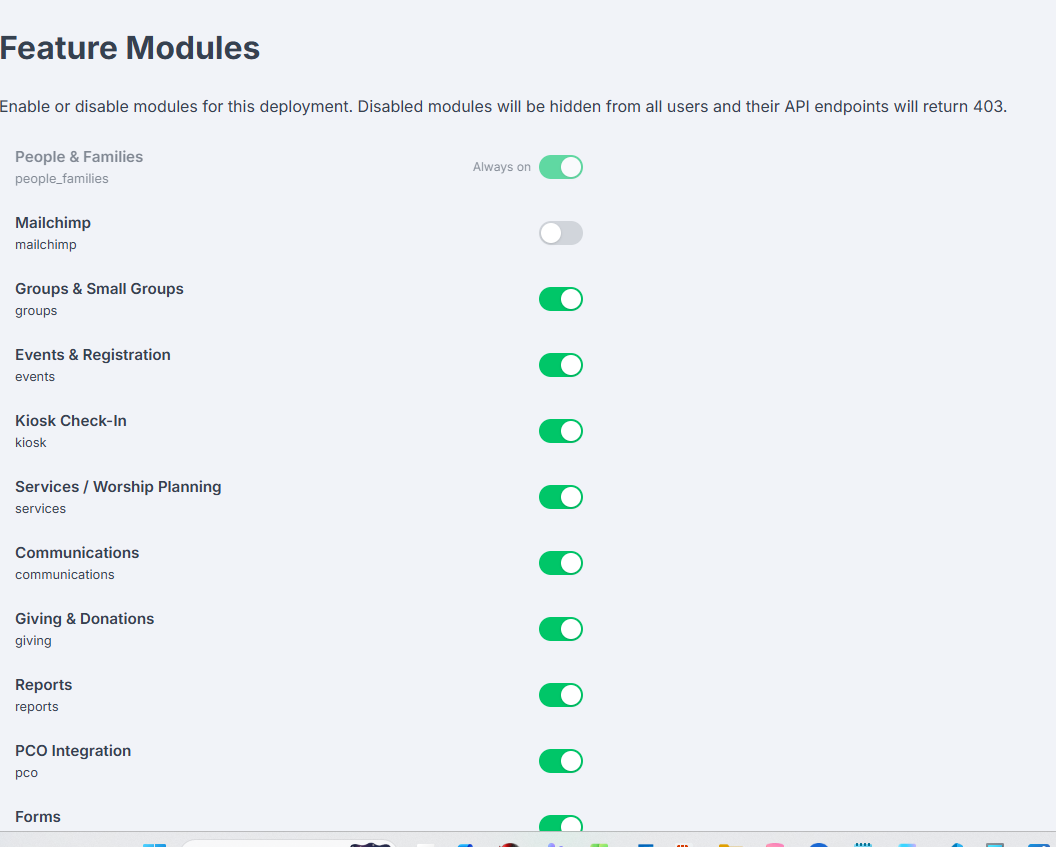
The Feature Modules page — toggle switches for included and add-on modules.
Custom Fields Admin
The Custom Fields page lets administrators define additional data fields on people records beyond the standard profile fields. Custom fields appear on person detail pages and can capture any church-specific information.
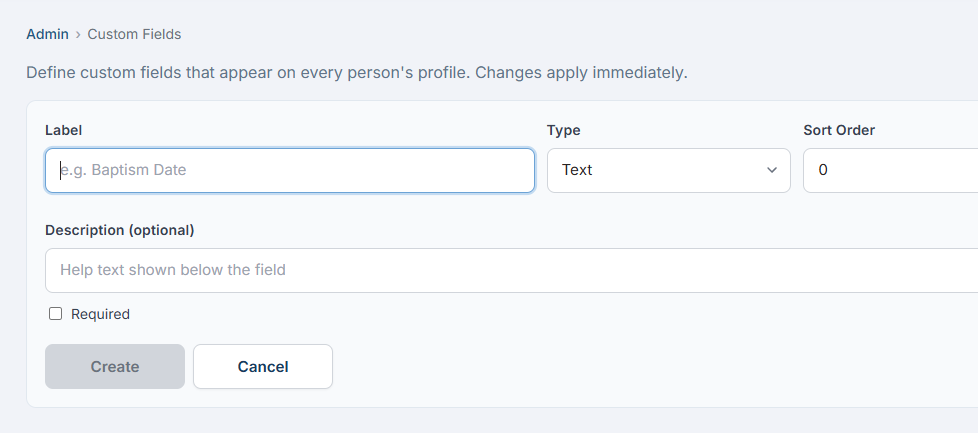
The Custom Fields admin page — field definitions with types, options, and ordering.
Deployment Configuration Superadmin
The Deployment Configuration page is a comprehensive checklist that tracks every setting required to fully deploy and configure the platform for a church. It is accessible only to Superadmin users at /admin/deployment-config.
The checklist contains 67 items across 14 categories, covering everything from server infrastructure and database setup to branding, payment processors, email/SMS configuration, and feature flags.
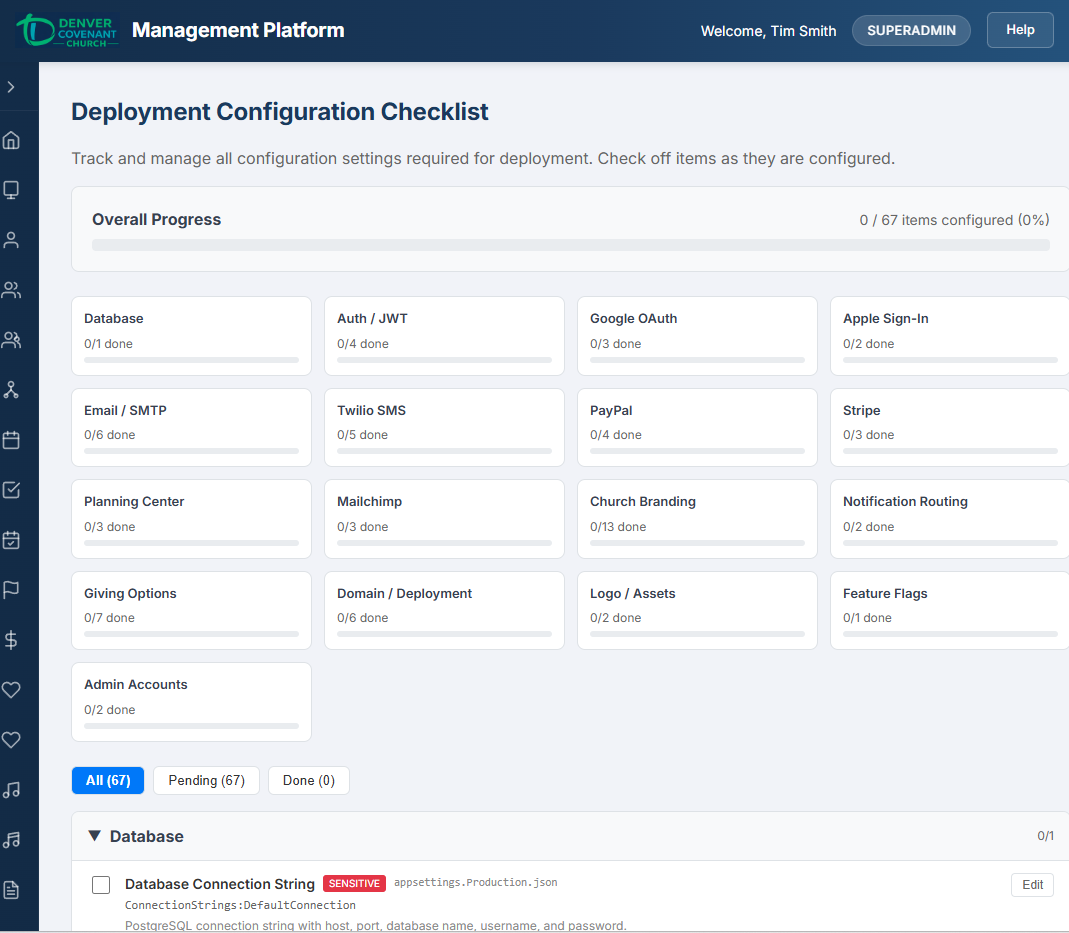
The Deployment Configuration page — category progress bars, expandable sections, and per-item status tracking.
Key Features
- Category progress — each category shows a progress bar (e.g., “3 of 8 complete”) so you can see at a glance what’s done and what remains.
- Filter by status — toggle between viewing all items, only pending items, or only completed items to focus on what needs attention.
- Per-item notes — add free-text notes to any item (e.g., “Waiting on DNS propagation” or “Using sandbox keys until go-live”).
- Non-sensitive value storage — items can store their configured value (e.g., domain name, port number) for quick reference. Sensitive items (API keys, passwords) are tracked as configured/not-configured without storing the actual value.
- Expand/collapse categories — click a category header to expand or collapse its items, keeping the page manageable.
Categories
The 14 categories cover the full deployment surface:
- Server & Infrastructure
- Database
- Domain & SSL
- Application Settings
- Authentication
- Email Configuration
- SMS Configuration
- Church Branding
- Payment Processing
- Planning Center Integration
- Mailchimp Integration
- Feature Flags
- Mobile App
- Backup & Monitoring
Audit Log Admin
The Audit Log page provides a complete history of changes and administrative actions across the platform. It is accessible at /admin/audit-log under Configuration → Audit Log in the sidebar, and requires the admin.platform permission.
The page has two tabs, each covering a different type of audit data.
Tab 1: Field Changes
This tab shows automatic, field-level change tracking for core entities. Every time a tracked record is created, updated, or deleted, the system records exactly which fields changed and their old and new values — with no manual effort from staff.
Tracked Entities
- Person
- Family
- Family Member
- User
- Event
- Check-In
- Donation
- Recurring Gift
- Church Group
- Group Membership
- Custom Field Value
Using the Filters
- Entity Type — narrow results to a specific record type (e.g., only Person changes).
- Action — filter by INSERT (new records), UPDATE (edits), or DELETE (removals).
- Entity ID — search for changes to a specific record by its ID number.
- Date range — restrict results to a specific time period.
Click any row to expand it and see the field-level diff: each changed field with its old value (red) and new value (green). For new records (INSERT), only new values are shown. For deletions, only old values are shown.
Tab 2: Admin Actions
This tab logs high-impact administrative actions that go beyond simple data edits. These are explicitly recorded when administrators perform significant operations.
Action Types
| Action | Description |
|---|---|
| Role Change | A user’s role was changed (e.g., Member → Staff). Logs old and new role. |
| Role Permissions Change | The default permissions for a role were updated. |
| Permission Override | Individual permission overrides were set on a user account. |
| Feature Toggle | A feature module was enabled or disabled. |
| Account Verify | An administrator verified a new family or person account. |
| Person Deactivate | A person record was deactivated (soft-deleted) from the directory. |
| Password Reset | A user reset their password via the forgot-password email link. |
| Password Change | A user changed their own password from the settings page. |
| Account Lockout | An account was automatically locked after 5 consecutive failed login attempts (15-minute lockout). |
| Donation Manual Entry | An administrator manually entered a cash, check, or other offline donation. |
| Broadcast Sent | An email or SMS broadcast was sent to recipients. |
Using the Filters
- Action Type — narrow results to a specific type (e.g., only Role Changes).
- Date range — restrict results to a specific time period.
Click any row to expand it and see the full description, target entity, and any additional metadata (shown as structured data).
Practical Use Cases
- “Who changed this family’s address?” — Field Changes tab → filter by Family entity type → find the UPDATE with the address field diff.
- “When was this user’s role changed?” — Admin Actions tab → filter by Role Change → see who changed it, from what role to what role.
- “Has someone been locked out?” — Admin Actions tab → filter by Account Lockout → see the affected account and timestamp.
- “What broadcasts were sent this month?” — Admin Actions tab → filter by Broadcast Sent + date range → see channel, subject, and recipient count.
Public Kiosk Check-In
The public kiosk is a full-screen, touchscreen-friendly check-in station. No login is required. Access it at /kiosk.
Phone Lookup
- Tap anywhere on the “Welcome” screen to open the phone keypad.
- Enter your phone number using the on-screen keypad (or a physical keyboard). The number auto-formats as you type.
- Tap Enter (or press Enter on a keyboard). The system looks up your family by phone number.
- If found, you’re taken to the check-in screen. If not found, an error message appears.
Check-In Screen
After a successful phone lookup, the check-in screen shows your family members in rows:
- Each row has the person on the left (avatar, name, age/relationship, allergies in red) and available event tiles on the right.
- Click an event tile to select that person for check-in. People with only one available event are auto-selected.
- Already checked-in people show a green tile with their security code.
- Select the event(s) for each person you want to check in.
- Tap Check In (N). All selected people share one security code.
- Labels print automatically (child name labels + parent pickup ticket + volunteer name badges).
- The kiosk returns to the welcome screen with the keypad ready for the next family.
Label Printing
Labels are designed for 4″×2″ thermal label printers (e.g., Zebra ZD421). Three label types are printed automatically on check-in:
Child Name Label
- First name (large bold), last name (medium bold)
- Allergies in red (if any)
- Event time and group name (e.g., “9:00 AM Third Grade”)
- Security code in large monospace at bottom-left
Parent Pickup Ticket
- Two identical halves (can be torn apart) separated by a dashed divider
- Security code (large) and date centered in each half
- Footer: “*** Keep this ticket to pick up your child(ren) ***”
Volunteer Name Badge
- First name (large centered), last name (medium centered)
- Group name centered
- Bottom row: time (left) and date (right)
- No security code
Troubleshooting
Common Issues
| Problem | Solution |
|---|---|
| Kiosk says “Phone number not found” | Ensure the phone is registered, set as primary, and verified. The kiosk only matches verified primary phone numbers. |
| “No active event found” on check-in | The person must be a member of a church group that has an event within the check-in window. Verify: (1) person has an active group membership, (2) the event is linked to that group (or a parent group), (3) the event is within the check-in window (opens 5 hours before for first event of day). |
| Labels don’t print | Check that pop-ups are allowed. Ensure the label printer is connected and set as the default printer. Labels are formatted for 4″×2″ stock. |
| Session expired / redirected to login | Login sessions expire after the time configured in the system (default: 60 minutes). Sign in again. |
| Cannot verify phone number | Ensure you entered the correct phone number. Codes expire after 10 minutes. Click “Resend Code” to get a new one. Only one code can be sent per minute. |
| Google Sign-In not working | Ensure pop-ups are allowed and third-party cookies are not blocked. Try a different browser if the issue persists. |
| Photo upload fails | Photos must be JPG, PNG, or WebP and under 5 MB. Try resizing the image. |
| Form registration shows missing fields | Click the tile with the red “!” badge to expand the inline editor. Fill in all required fields (DOB, email, phone, etc.) and click “Save & Select.” |
Check-In Window Timing
The smart check-in window determines when events are available for check-in:
| Scenario | Opens | Closes |
|---|---|---|
| First event of the day for a group | 5 hours before start | 30 minutes before end |
| Subsequent event (same group, same day) | 30 minutes before start | 30 minutes before end |
Events without an explicit end time default to 90 minutes after the start time.
Security Codes
Security codes follow a Letter-Number-Letter-Number pattern (e.g., A3K7). The letters I and O are excluded to avoid confusion with 1 and 0. All children checked in as a batch share the same security code.