The People & Families module is the foundation of the Church Management Platform. It provides account creation, authentication, family records, people search, admin verification, and the role-based security system that all other modules build on. This module is always active and cannot be disabled.
Connection Card
The Connection Card is the simplest way for first-time visitors to share their contact information with your church. No app download, no account creation, no login required — visitors simply fill out four fields and they’re done.
Two Ways to Connect
Visitors can reach the connection card through either path — both open the same simple form:
| Method | How It Works | Phone Pre-Filled? |
|---|---|---|
| Text Message | Visitor texts CONNECT (or HI / HELLO) to your church’s SMS number. They receive a link back to the connection card form with their phone number already filled in. | Yes — verified |
| QR Code | Visitor scans a QR code displayed on a bulletin, lobby screen, seat card, or projection slide. The form opens with all fields blank. | No |
What the Visitor Sees
The connection card is a branded, mobile-friendly page with your church logo and name. It has just four fields:
- First Name (required)
- Last Name (required)
- Phone (required — auto-formatted as you type)
- Email (optional)
After submitting, the visitor sees a “Thank you” screen with a link to your church website.
Smart Email Verification
When a new visitor enters their email, the system checks for common typos before saving. If it detects a likely misspelling (for example, gmal.com instead of gmail.com, or a local part that’s one character off from an existing record), it shows a friendly “Did you mean…?” suggestion. The visitor can accept the correction or keep their original entry.
For Church Admins
Connection card submissions create a Person record in the system (no login account). These new people appear in your Family Verification queue for admin review, just like any other new person.
- SMS path visitors have their phone marked as verified (they proved ownership by texting from it)
- QR path visitors have an unverified phone (they typed it manually)
- All connection card people start with Person Verified = No until an admin reviews and approves them
Setting Up the QR Code
- Your connection card URL is:
https://your-domain.com/connect - Generate a QR code for this URL using any free QR code generator
- Print the QR code on bulletins, welcome cards, lobby displays, or projection slides
- Optionally add text: “Text CONNECT to (866) 755-3107 or scan this code”
Sign Up
There are two ways to create an account: email registration or Google sign-in.
Email Registration
- Open the app in your browser and click Sign Up on the login page.
- Enter your First Name, Last Name, Email Address, and choose a Password.
- Enter your Phone Number. You can type it in any format (e.g., 8055551212, 805-555-1212, or (805) 555-1212) — it will be auto-formatted.
- Click Create Account.
- Your account is created and you are taken to the Dashboard.
Google Sign-In
- On the login page, click the Sign in with Google button.
- Select your Google account from the popup window.
- If this is your first time, the system creates your account automatically using your Google profile name and email.
- You will be asked to complete your profile by entering a phone number, since Google does not provide one.
- After completing your profile, you are taken to the Dashboard.
Sign In
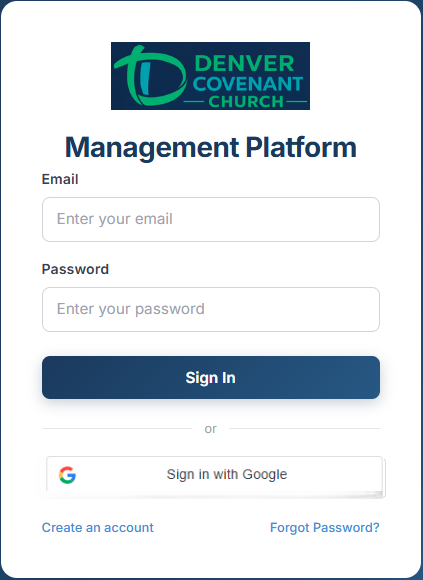
The sign-in page — email/password fields with Google Sign-In option.
Email Sign-In
- Enter your Email and Password.
- Click Sign In.
- You are taken to the Dashboard.
Google Sign-In
- Click Sign in with Google.
- Select your Google account. If it matches an existing account, you are signed in immediately.
Forgot Password
- Click Forgot Password? on the login page.
- Enter the email address associated with your account.
- Check your inbox for a password reset email (sent from the church’s configured email address).
- Click the reset link in the email. The link is valid for 1 hour.
- Enter and confirm your new password, then click Reset Password.
Verify Your Phone
After creating an account (or completing your profile for Google sign-in), you must verify your phone number before you can access the app:
- A 6-digit verification code is sent to your phone via SMS.
- Enter the code on the verification screen.
- Click Verify.
- Once verified, you are taken to the Dashboard.
Verify Your Email (Optional)
Email verification is optional but recommended. Unlike phone verification (which is required to access the app), email verification confirms that the email address on your account is valid and belongs to you.
How to Verify
- Navigate to your profile by clicking your name on any family page, then click Edit.
- In the Contact Info section, unverified emails show a Verify Email button. Click it.
- Check your inbox for a verification email with a Verify Email button.
- Click the link in the email. The link expires after 24 hours.
- You’ll see a confirmation page. Your email is now verified.
Phone vs. Email Verification
| Phone Verification | Email Verification | |
|---|---|---|
| Required? | Yes — blocks access until complete | No — optional but recommended |
| When? | Immediately after account creation | Any time, from the Edit Person page |
| Method | 6-digit SMS code (auto-sent) | Click-to-verify link sent via email |
| Expiry | 10 minutes | 24 hours |
| Purpose | Kiosk check-in phone lookup + account security | Password resets + notifications |
Navigation & Layout
Once signed in, every page shares a consistent layout with a header bar at the top and a sidebar on the left.
Header
The header shows the app name and your account controls (sign out).
Sidebar
The sidebar provides quick access to all available sections. It has two states:
- Collapsed (56px wide) — shows only icons. Hover over an icon to see a tooltip with the section name.
- Expanded (220px wide) — shows icons and labels. Click the menu icon in the header to toggle.
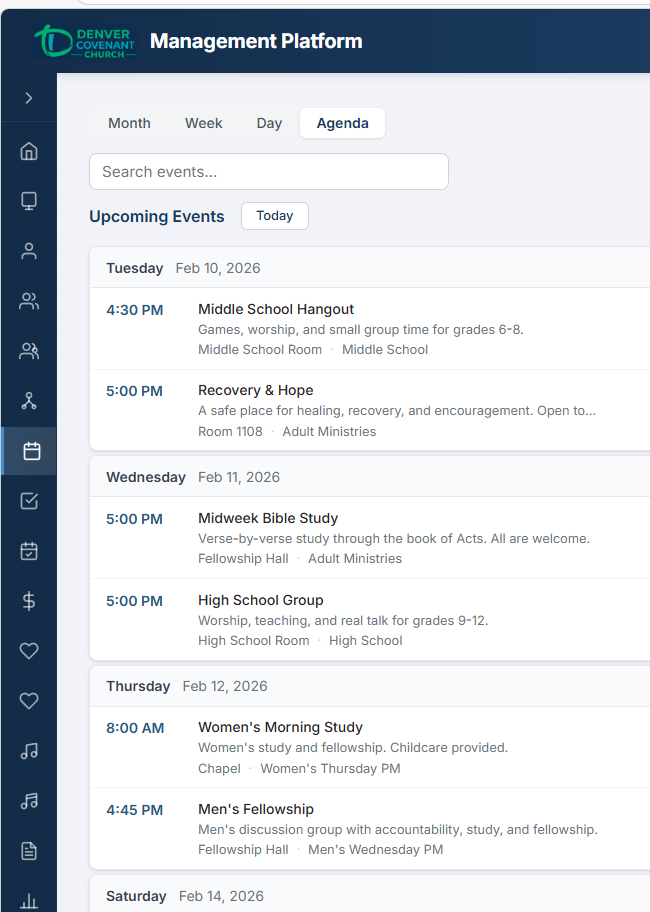
Collapsed sidebar — icons only (56px).
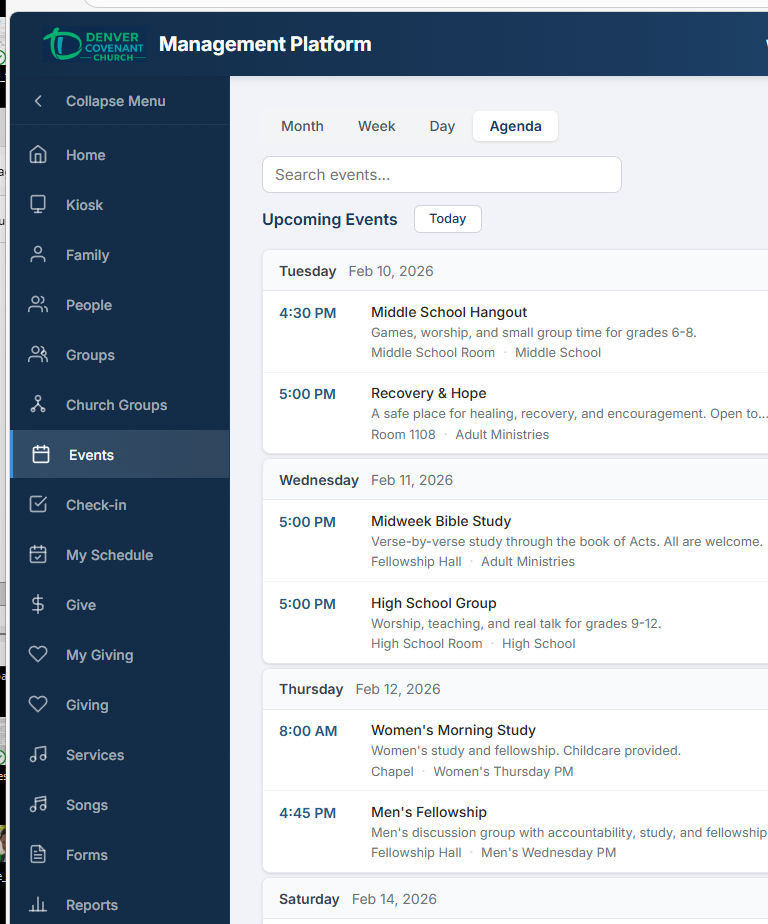
Expanded sidebar — icons and labels (220px).
The sidebar items you see depend on your role and which modules are enabled for your church. At a minimum, every user sees:
- Home — the Dashboard
- Family — your family page
- People — people search
Administrators see additional items for each enabled module (Events, Groups, Reports, etc.).
Dashboard
The Dashboard is your home page after signing in. It is organized into tabs.
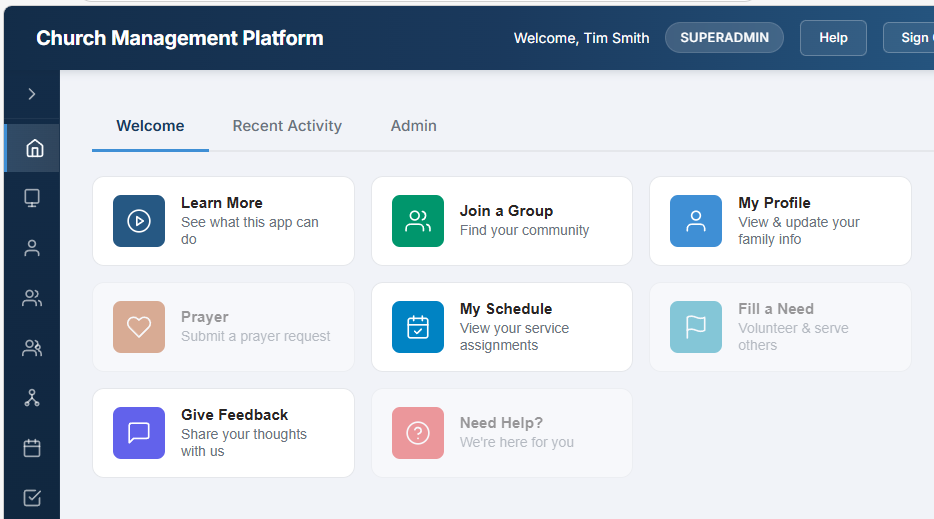
The Dashboard Welcome tab with quick-access action buttons.
Welcome Tab (All Users)
The Welcome tab has two areas:
Quick-action buttons for common tasks — the buttons shown depend on your role and which feature modules are enabled for your church (buttons for disabled modules are automatically hidden):
- Learn More — opens the platform documentation
- Join a Group — browse and join small groups
- My Profile — view and edit your family information
- My Schedule — view your service team assignments
- Give Feedback — submit feedback, feature requests, or bug reports directly to administrators
- Need Help? — opens the platform documentation
Below the buttons, the Welcome tab also displays:
- Upcoming Events — the next 7 events within 30 days, showing date, time, and location, with a link to the full calendar
- Church Info — service times, address, and website (pulled from church branding configuration)
Recent Activity Tab
If you have the appropriate permissions (e.g., reports.view), a Recent Activity tab appears. It shows a summary of activity across the system over the last 10 days, with filter chips for each category (families, people, events, check-ins, registrations, forms, submissions, donations). Click a chip to see detailed entries for that category. Filter chips are also gated by feature flags — categories for disabled modules are hidden.
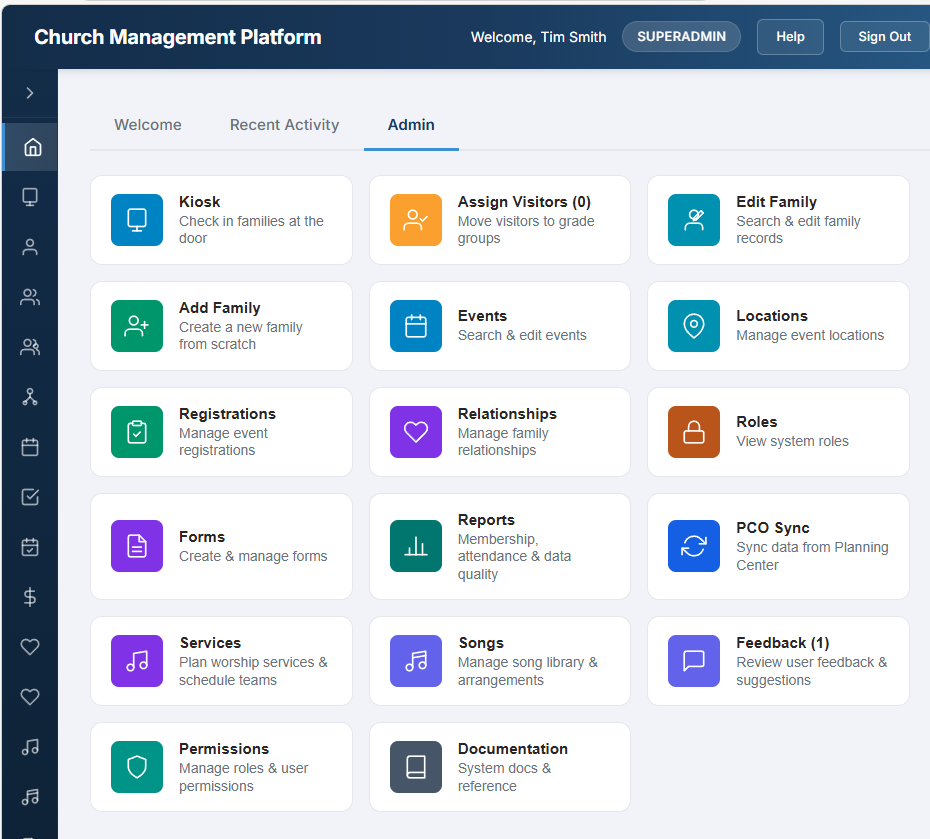
The Dashboard Admin tab with summary tiles and admin action cards.
Admin Tab
If you have administrative permissions, an Admin tab appears. It displays summary tiles with counts for key areas. Like the Welcome tab, the tiles shown are filtered by which feature modules are enabled and which permissions you hold. Tiles include:
- New Families — count of unverified families awaiting review (click to enter verify mode)
- Total People — total active people in the system
- Total Families — total active families
- Additional tiles for other enabled modules (events, groups, visitors, etc.)
Family
The Family page shows your household. It is divided into two sections: Adults and Children. Each person appears as a tile with their photo (or a grey silhouette placeholder), name, and key details.
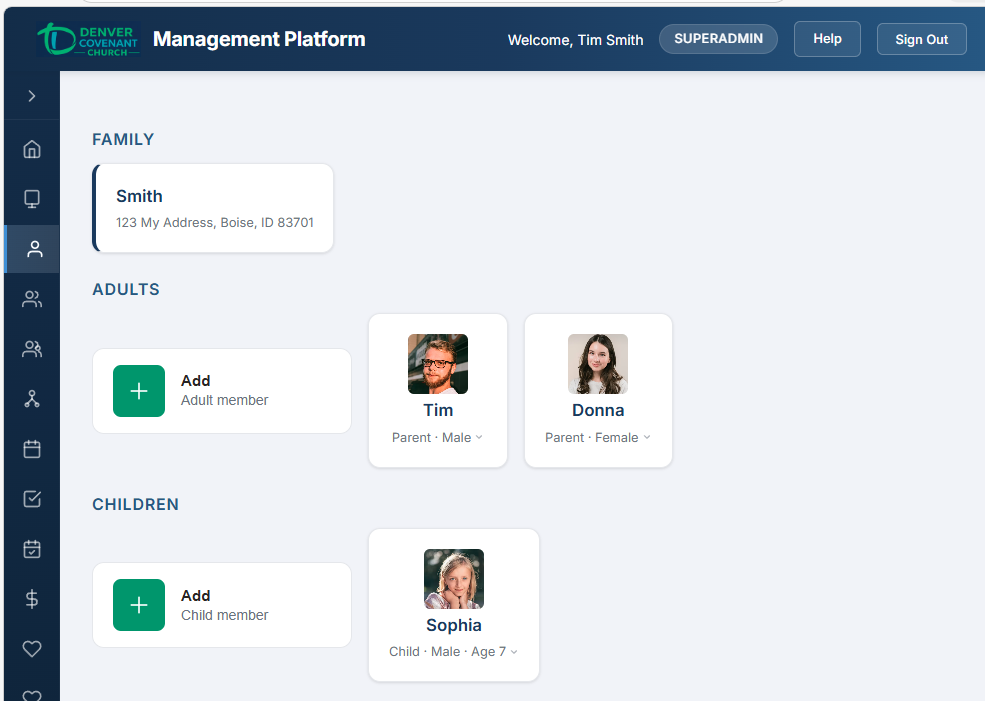
A family page showing adults and children tiles with contact info and details.
Adults Section
Adults are family members aged 18 and over (or those without a date of birth who were added as adults). Each adult tile shows:
- Photo or silhouette placeholder
- Full name
- Email address and phone number (if on file)
- Relationship to the family (e.g., Head of Household, Spouse)
Click an adult tile to view or edit their details (see Edit a Person).
Children Section
Children are family members under 18. Each child tile shows:
- Photo or silhouette placeholder
- Full name
- Age (calculated from date of birth)
- Gender
- Allergies (highlighted in red if present)
Click a child tile to view or edit their details.
Adding a Family Member
- On your Family page, click + Add Adult or + Add Child.
- Enter the person’s First Name and Last Name (required).
- Fill in optional details: Date of Birth, Gender, Email, Phone, Allergies.
- Click Save.
- The new person appears on your Family page immediately.
Edit a Person
Click any person tile (on your Family page, in search results, or during admin verification) to open their detail/edit page.
Profile Photo
- On the edit page, click the photo area (or the Upload Photo button).
- Select an image file from your device. Accepted formats: JPG, PNG, or WebP. Maximum size: 5 MB.
- The photo preview updates immediately so you can confirm the image before saving.
- Click Save to upload the photo to the server.
Personal Information
The following fields can be edited:
| Field | Details |
|---|---|
| First Name | Required |
| Last Name | Required |
| Date of Birth | Used to calculate age, determine adult vs. child status |
| Gender | Male, Female, or unspecified |
| Allergies | Only shown for children. Free text, comma-separated. Displayed in red on check-in labels and kiosk screens for child safety |
Contact Info
When editing your own record (or if you have the families.manage permission), the Contact Info section appears with editable email and phone fields. Each field shows a verification badge:
- Verified — contact has been confirmed
- Unverified — not yet verified
- Changed — value was modified (will need re-verification on save)
Changing your phone number will require SMS re-verification. Changing your email will prompt you to send a verification email.
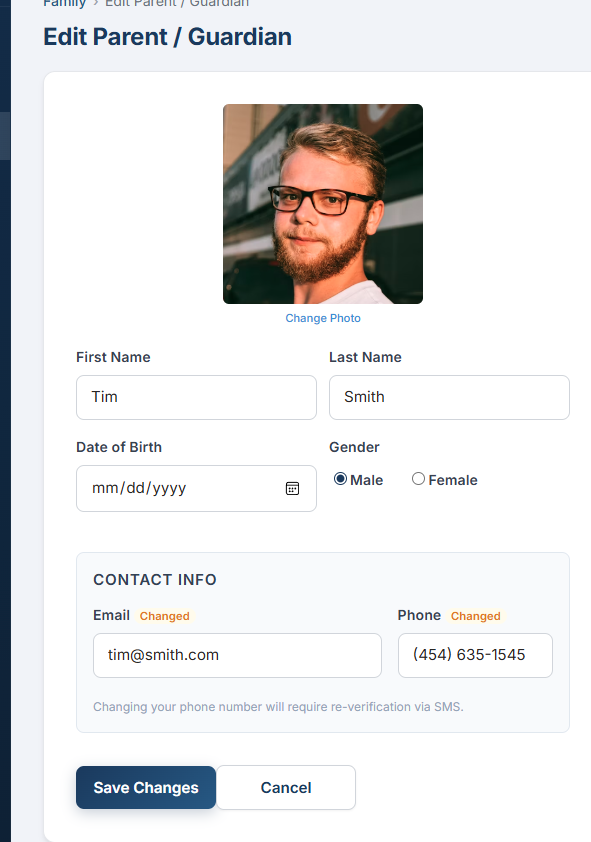
Edit Person — Contact Info with verification status badges
After making changes, click Save Changes to update the record.
People Search
The People page provides a powerful search across all records in the system.
How to Search
- Click People in the sidebar.
- Type in the search box. The search is smart — it automatically detects what you are looking for:
- Name — type any part of a first or last name (e.g., “John” or “Smith”)
- Phone number — type digits (e.g., “8055551212”) and it searches phone records
- Email — type an “@” and it searches email records
- Results appear as you type, showing each person’s photo, name, and contact information.
- Click a result to open that person’s detail page.
Family Verification Admin
When new families or people are added to the system, they default to unverified. The verification workflow lets administrators review and approve each record.
Starting Verify Mode
- Go to the Dashboard and click the Admin tab.
- Click the New Families tile (which shows the count of unverified families).
- You enter verify mode on the Families page, stepping through one unverified family at a time. A progress indicator shows “Family 1 of N.”
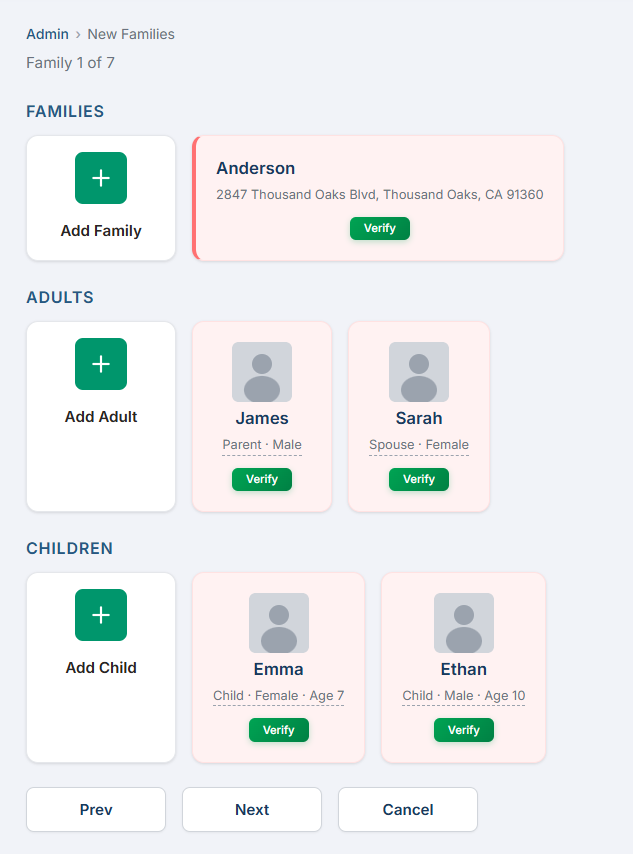
The verification screen — unverified records highlighted in pink with green Verify buttons. Progress indicator shows “Family 1 of 7.”
Reviewing a Family
In verify mode, the family page displays each record as a tile. Unverified records are highlighted:
- Pink background (
#fff0f0) indicates the tile is unverified. - A small green Verify button appears on each unverified tile.
- Verified tiles appear with a normal white background and no button.
Verifying Records
- Review the family details and each person’s information. Click any tile to edit it if corrections are needed.
- Click the green Verify button on the family tile to verify the family record.
- Click the green Verify button on each person tile to verify individual members.
- Each verification is independent — verifying the family does not automatically verify its members, and vice versa.
- Click Next to advance to the next unverified family.
- Click Cancel to exit verify mode and return to the Dashboard.
Roles & Permissions Admin
The system uses a role-based security model with granular permissions. Every user is assigned exactly one role. Each role comes with a default set of permissions that control which features are accessible. Administrators can also grant or revoke individual permissions per user.
12 Roles
| Role | Description | Access Level |
|---|---|---|
| SUPERADMIN | App owner | All 32 permissions plus platform configuration (Feature Modules, PCO Sync, Permissions admin). |
| ADMIN | Full system administrator | All permissions except platform configuration. Can manage users, verify families, manage roles. |
| STAFF | Church staff member | Broad read access to people, families, events, groups, and reports. Can edit people records. |
| EVENT_COORDINATOR | Manages events and registrations | Full events CRUD (create, edit, delete, manage), view attendance, manage registrations. |
| CHECKIN_ADMIN | Manages kiosk check-in | Check-in management, admin kiosk, visitor assignment, and check-in reports. |
| GROUP_LEADER | Small group or ministry leader | Manage their own group, view group members, record group attendance. Access scoped to groups they lead. |
| WORSHIP_LEADER | Services/worship planning | Manage service plans, song library, team scheduling, and all worship planning features. |
| FINANCE_MANAGER | Giving management | Manage giving funds, view all donations, record manual entries, export giving data. |
| FINANCE_VIEWER | Read-only giving access | View all donation records and giving reports without the ability to create or modify data. |
| TECH_ADMIN | Integrations and audit | Manage PCO integration, view audit logs, and handle technical configuration. |
| VOLUNTEER | Serves in a ministry role | View their own schedule, check in at kiosk, access assigned areas. |
| MEMBER | Regular church member (default) | View and edit their own family, browse small groups, register for events, give online. |
Granular Permissions
The system has 32 granular permissions organized by module. Each permission follows a {resource}.{verb} pattern. For example, events.manage grants full event management, while events.view grants read-only access to events.
Permission verbs: view (read), create, edit, delete, manage (all of the above + module config), export (download data).
Per-User Overrides
Beyond role defaults, administrators can grant or revoke individual permissions for specific users. For example, a MEMBER could be granted events.create to allow them to create events without changing their role. Overrides are managed from the Permissions admin page.
Permissions Admin Page
Administrators with the admin.users permission can manage permissions at Configuration → Permissions. The admin page has three tabs:
- Role Permissions — View and edit the default permission set for each role using a checkbox grid grouped by module.
- User Overrides — Search for a user, view their role defaults, and toggle grant/revoke overrides for individual permissions.
- Role Assignment — Search for a user and change their role.
Troubleshooting
Common Issues
| Problem | Solution |
|---|---|
| I keep getting logged out | Login sessions expire after the configured duration (default: 60 minutes). Sign in again. If you are using a shared or public computer, this is expected behavior for security. |
| I never received my verification code |
|
| Verification code is “invalid” | Codes are digits only. Ensure you are entering the most recent code — if you clicked Resend, previous codes are no longer valid. Codes expire after 10 minutes. |
| I can’t upload a photo |
|
| Google Sign-In popup does not appear | Ensure your browser allows pop-ups from this site. Check that third-party cookies are not blocked. Try a different browser (Chrome works best with Google Sign-In). |
| Password reset email not received | Check your spam/junk folder. The email is sent from the church’s configured email address. If it does not arrive within a few minutes, try requesting another reset. Contact your administrator if the problem continues. |
| “Email already registered” during sign-up | An account with that email already exists. Try signing in instead, or use Forgot Password to set a new password. If you previously signed in with Google, use the Google button instead. |
Account Sign-In Flow
The complete flow from first visit to full access:
Email or Google
Google users only
6-digit SMS code
Full access
Optional (recommended)
User Feedback
The platform includes a built-in feedback system that lets any authenticated user share suggestions, report bugs, ask questions, or send praise directly to the admin team — no email required.
Submitting Feedback
From the Dashboard Welcome tab, click the Give Feedback button. A dialog will appear with the following fields:
- Category — choose from: General, Bug Report, Feature Request, Praise, Question, or Other
- Subject — a short summary of your feedback
- Message — the full details
Your name is automatically attached to the submission based on your logged-in account.
Admin: Managing Feedback
Administrators can view and manage all submitted feedback at Admin → Feedback (accessible from the Dashboard Admin tab).
- Filter by category (bug, feature, etc.) and status (resolved / unresolved)
- Expand any entry to read the full message
- Admin Notes — add internal notes visible only to administrators
- Resolve / Unresolve — toggle the status to track which items have been addressed
- Delete — permanently remove a feedback entry
The Dashboard Admin tab also shows an Unresolved Feedback tile with a count of open items, so nothing gets overlooked.