Overview
The Groups & Small Groups module provides two distinct but complementary systems for organizing people within your church:
- Church Groups — A formal, hierarchical structure organized into Departments, Areas, and Groups. Managed exclusively by administrators. Ideal for ministry teams, committees, and organizational units.
- Small Groups — Community-oriented groups that members can browse, request to join, and interact with leaders. Supports rich metadata like meeting schedules, demographics, and geographic areas.
My Groups All Users
The My Groups page displays every group you currently belong to. Each group card shows:
- Group photo — a thumbnail image (or default placeholder if none has been uploaded)
- Group name and type (e.g., Bible Study, Fellowship, Service)
- Leaders — names and leader type (Leader, Coach, or Other)
- Your join status — Active member, Pending request, etc.
Small Groups All Users
The Small Groups page lets you browse all available small groups. Use the search and filter tools to find a group that fits your interests and schedule.
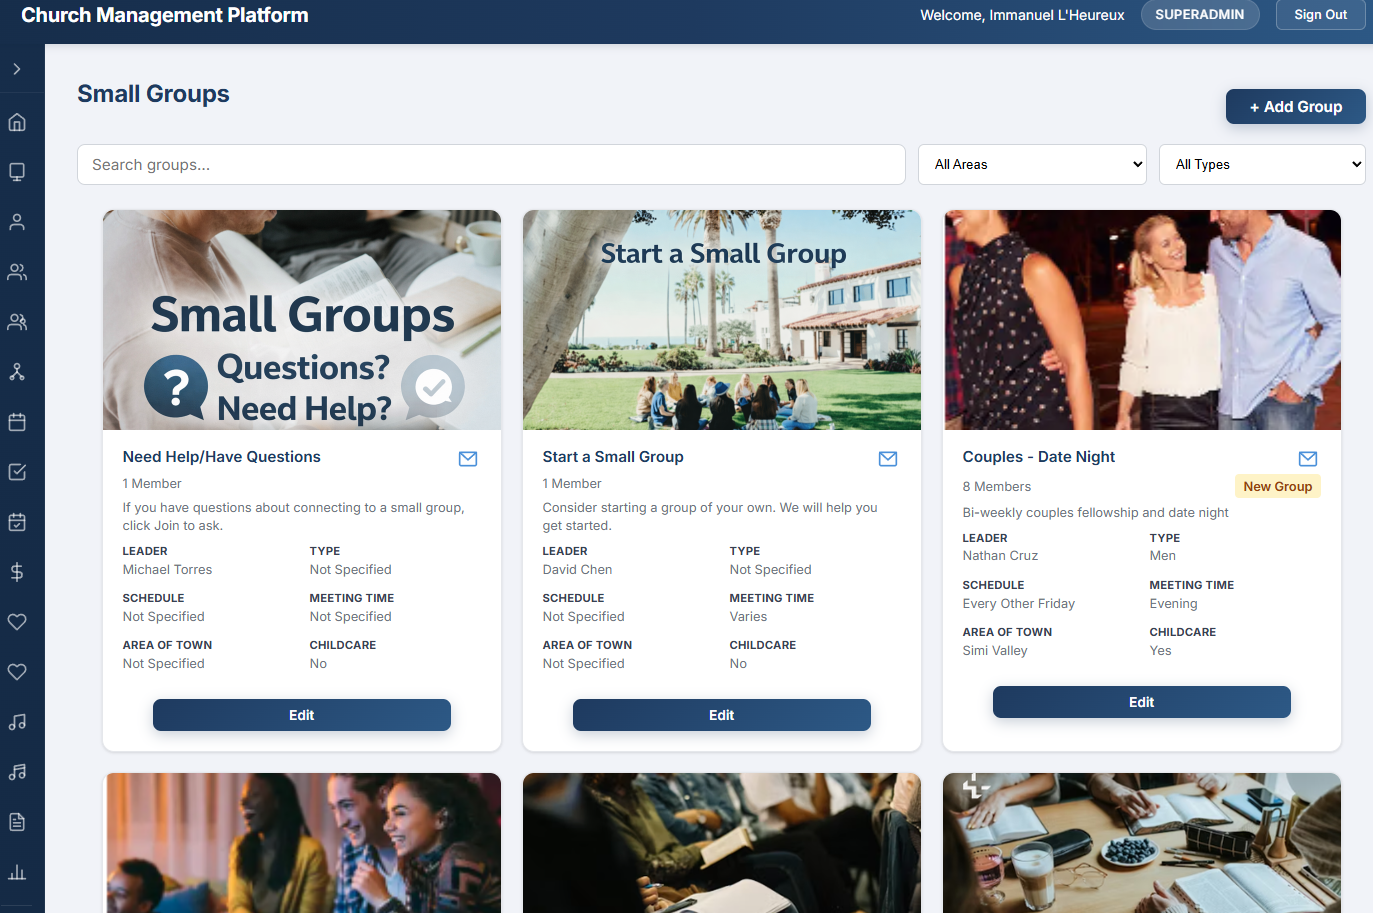
The Small Groups browsing page — group cards with photos, meeting details, and search/filter tools.
Search & Filters
- Search bar — type a keyword to filter groups by name or description in real time
- Area dropdown — filter by geographic area (e.g., North, South, Central) to find groups near you
- Type dropdown — filter by group type (e.g., Bible Study, Fellowship, Prayer, Service) to match your interests
Filters can be combined. For example, you can search for "prayer" groups in the "Westside" area.
Group Cards
Each small group is displayed as a card showing:
- Group photo (or placeholder)
- Group name and description
- Meeting day, time, and frequency
- Whether childcare is available
- Leader names
- Join rule indicator — shows whether the group is open to new members, requires approval, or is closed
Join a Group All Users
When you find a small group you would like to join, click the Request to Join button on the group card or detail page.
How It Works
- Browse or search for a small group on the Small Groups page.
- Click Request to Join. Your request is submitted immediately.
- The group leader receives an email notification with your name and contact information.
- The leader reviews your request and approves or denies it.
- Once approved, the group appears on your My Groups page.
Tracking Your Requests
You can check the status of all pending requests under the My Requests section on the Small Groups page. Each request shows:
- Group name
- Date requested
- Current status — Pending, Approved, or Denied
Message a Leader All Users
You can contact any small group leader directly without needing their personal email address.
- Navigate to the small group detail page and click the envelope icon next to the leader's name.
- Fill in the Subject and Message fields in the popup form.
- Click Send. The system sends an email to the leader on your behalf.
Who Can Access What
Access to groups features is controlled by two permissions:
| Permission | What It Grants |
|---|---|
groups.view | View church groups tree and group details (read-only) |
groups.manage | Create, edit, and delete church groups; manage memberships; full small group admin; upload group photos |
All authenticated users can browse small groups, join groups, and message leaders — no special permission required. The admin features below require the groups.manage permission.
Church Group Tree Admin
The Church Groups page displays all organizational groups in a hierarchical tree view with three levels:
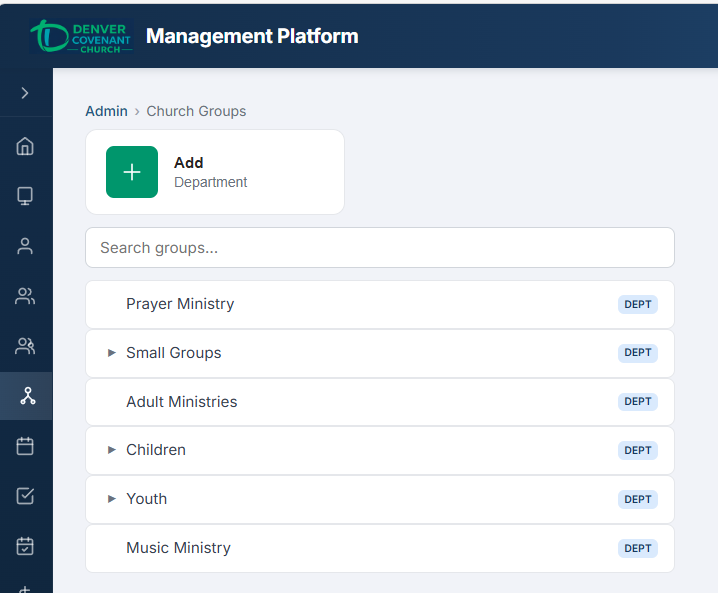
The Church Group Tree — departments, areas, and groups in a collapsible hierarchy with member counts.
| Level | Description | Example |
|---|---|---|
| Department (Level 1) | Top-level organizational division | Worship Ministry, Children's Ministry |
| Area (Level 2) | Subdivision within a department | Choir, Band, Media (under Worship Ministry) |
| Group (Level 3) | Individual team or unit | Alto Section, Sound Team, Projector Operators |
The tree is fully collapsible. Click a department or area name to expand or collapse its children. Each node shows the number of direct child groups for quick reference.
Group Management Admin
Administrators can add, edit, and delete groups at every level of the hierarchy.
Adding a Group
- Navigate to the Church Groups page.
- Click the + Add button at the appropriate level (Department, Area, or Group).
- Fill in the group details:
- Name — the display name of the group
- Description — optional text describing the group's purpose
- Type — the group type classification
- Parent Group — automatically set based on where you clicked Add (can be changed)
- Click Save. The new group appears in the tree immediately.
Editing a Group
- Click the group name in the tree to open the detail panel.
- Click Edit to modify the name, description, type, or parent group.
- Click Save to apply your changes.
Deleting a Group
- Select the group in the tree and click Delete.
- Confirm the deletion in the dialog. Groups with child nodes must have their children removed or reassigned first.
Managing Members
The group detail panel shows the full member list. From here you can:
- Add members by searching for people and clicking Add to Group
- Remove members by clicking the remove icon next to their name
- View each member's role, contact info, and profile link
Small Group Administration Admin
Administrators have full control over small group creation, configuration, and lifecycle. The admin view adds management controls on top of the standard small groups browsing page.
Creating a Small Group
- Navigate to the Small Groups page and click + New Small Group.
- Fill in the group details on the creation form.
- Click Save to create the group. It becomes immediately visible to all users.
Small Group Fields
Each small group supports the following configuration fields:
| Field | Description |
|---|---|
| Name | Display name of the group |
| Description | Free-text description shown on the group card and detail page |
| Type | Classification such as Bible Study, Fellowship, Prayer, Service, Support, etc. |
| Area | Geographic area (e.g., North, South, Central, Online) |
| Meeting Day | Primary day the group meets (Monday through Sunday) |
| Meeting Time | Start time of the meeting |
| Frequency | How often the group meets (Weekly, Bi-weekly, Monthly) |
| Childcare | Whether childcare is provided at meetings |
| Join Rule | Controls how new members join: Open (auto-add), Request to Join (leader approval), or Closed (not accepting) |
| Communication Type | Preferred communication method for the group (Email, Text, GroupMe, etc.) |
| Demographic | Target demographic (e.g., Young Adults, Men, Women, Couples, Seniors, Mixed) |
Editing a Small Group
Click any small group card to open its detail view, then click Edit to modify any of the fields listed above. Changes are saved immediately and reflected on the public browsing page.
Leader Management Admin
Each small group can have one or more leaders. Leaders receive email notifications for join requests and can be contacted by members through the "Message a Leader" feature.
Adding a Leader
- Open the small group detail page and scroll to the Leaders section.
- Click Add Leader.
- Search for and select the person to add as a leader.
- Choose the Leader Type:
- Leader — primary group leader, receives join request notifications
- Coach — mentoring or oversight role
- Other — supporting leadership role
- Click Save. The leader appears in the group's leader list and on public group cards.
Removing a Leader
Click the remove icon next to the leader's name in the Leaders section. The person remains a group member but loses the leader designation. This does not remove them from the group.
Group Photos Admin
Administrators can upload a representative photo for each small group. This photo appears on group cards in the browsing view and on the group detail page.
- Open the small group detail page and click the photo area or Upload Photo button.
- Select an image file from your computer. Accepted formats: JPG, JPEG, PNG, WEBP. Maximum size: 5 MB.
- The photo uploads immediately and a preview is shown. The new photo replaces any existing group photo.
Manage Join Requests Admin
When a member submits a join request for a group with the "Request to Join" rule, the request appears in the group's pending requests queue. Both administrators and designated group leaders can manage these requests.
Reviewing Requests
- Open the small group detail page and navigate to the Join Requests section.
- Each pending request shows the requester's name, email, phone number, and the date the request was submitted.
- Click Approve to add the person as a group member, or Deny to reject the request.
Request Lifecycle
| Status | Meaning |
|---|---|
| Pending | Awaiting review by a leader or administrator |
| Approved | Person has been added as a group member |
| Denied | Request was rejected; person was not added |
Quick Reference
Church Groups vs. Small Groups
| Feature | Church Groups | Small Groups |
|---|---|---|
| Structure | Hierarchical (Department → Area → Group) | Flat list with filters |
| Who can create | Admins only | Admins only |
| Who can browse | Admins only | All users |
| Join mechanism | Admin adds members directly | Open join, request to join, or closed |
| Leader roles | Not supported | Leader, Coach, Other |
| Meeting schedule | Not tracked | Day, time, frequency |
| Photos | Not supported | Group photo upload |
| Messaging | Not supported | Message a Leader (email) |