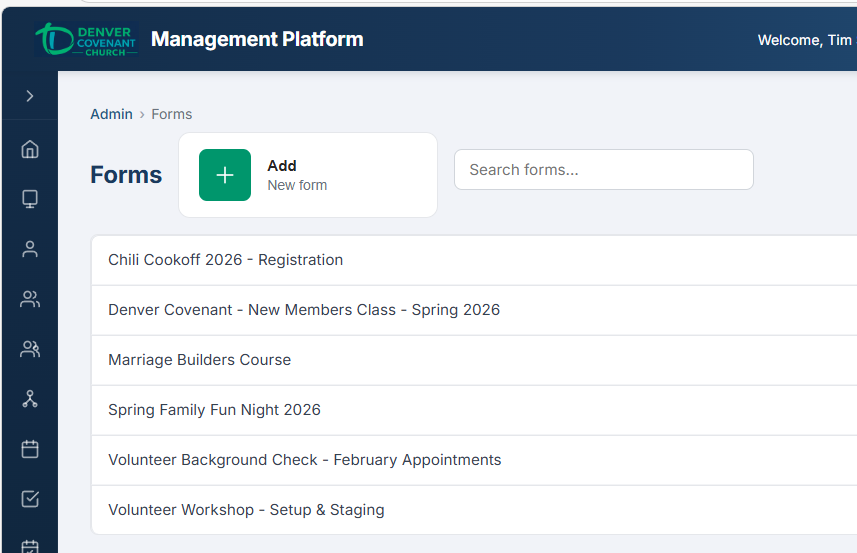
The Forms module lets your church create registration forms for events, collect attendee information, and send email invitations. Members receive a link to register themselves and their family members, while admins build and manage the forms, define required fields and custom questions, and track submissions.
forms.view (view forms and submissions — read-only) and
forms.manage (create and edit forms, configure fields, link events, send invitations, and manage submissions).
All authenticated users can fill out and submit forms they have been invited to — no special permission required.
Receiving an Invitation
When an admin sends invitations for a form, each recipient receives an email with the event schedule and a Register Now button. Tapping this button opens the registration form in your browser.
What the Email Contains
| Element | Description |
|---|---|
| Form Title | The name of the registration form (e.g., "VBS 2026 Registration") |
| Event Schedule | A list of all linked events with their dates and times, so you know what you are signing up for |
| Register Now Button | A link that opens the registration form directly in your browser at /forms/{formId} |
Registering
The registration page walks you through selecting who will attend, filling in any missing required information, and answering custom questions.
Event Display Modes
Forms display linked events in one of two ways, depending on how the admin configured the form:
Selectable Events
You can pick and choose which events to attend. Each event appears as a selectable item, and you tap to toggle your attendance for each one.
All Events Required (Series)
All linked events are a package deal. The events display as a non-selectable schedule showing dates and times, and registering signs you up for the entire series.
Step-by-Step Registration
- Open the registration link from your email invitation (the Register Now button). The form title and description appear at the top of the page.
- Review the event list. If events are selectable, tap each event you plan to attend. If the form is configured as a series, the full schedule is displayed for your reference.
- Select family members who will attend. Adults and children are shown in separate groups as tappable tiles. Tap each person's tile to select or deselect them.
- Check for missing information. If a selected person is missing a required field (such as date of birth, gender, or phone number), a red ! badge appears on their tile. Tap the tile to expand an inline editor where you can fill in the missing details without leaving the page.
- Answer any custom questions. These appear below the family member selection and may include text fields, dropdowns, checkboxes, and other input types (see Custom Fields below).
- Tap Register N People (where N is the number of selected family members) to submit the registration.
- A result summary appears confirming who was registered and for which events.
Family Member Tiles
| Element | Description |
|---|---|
| Adult Section | Shows all adult family members as selectable tiles |
| Children Section | Shows all child family members as selectable tiles |
| Selected State | Tapped tiles are highlighted, indicating the person will be registered |
| Red ! Badge | Appears when a selected person is missing a required field. Tap to expand inline editing |
| Inline Editor | Expands below the tile to let you fill in missing fields (DOB, gender, email, phone, address, allergies) without navigating away |
Custom Fields
In addition to standard required fields, forms may include custom questions defined by the admin. These appear after the family member selection and must be answered for each selected person (if marked as required).
Input Types You May Encounter
| Type | What It Looks Like |
|---|---|
| Text | A free-text input field where you type your answer |
| Dropdown | A list of predefined options; select one from the menu |
| Checkbox | A yes/no toggle or multiple-choice selection (select all that apply) |
| Radio | A set of options where you must pick exactly one |
| Slider | A horizontal slider between two labeled endpoints (e.g., "Strongly Disagree" to "Strongly Agree") |
| Number Stepper | A numeric input with increment and decrement buttons |
You may also see display-only elements that provide context but do not require input:
Header
A bold section heading that groups related questions together visually.
Info Text
A block of informational text from the admin, providing instructions or context for the questions that follow.
White Space
A visual separator adding vertical spacing between sections of the form for readability.
Form Builder Admin
Admins create and manage registration forms from the Forms page. Each form has a title, description, and configuration options that control how registrants interact with it.
The Form Builder — configure title, required fields, and add custom field types.
Creating a New Form
- Navigate to Forms from the sidebar menu.
- Tap + New Form to open the form builder.
- Enter a Title for the form (e.g., "VBS 2026 Registration", "Fall Retreat Sign-Up"). This is what recipients see in their invitation email and at the top of the registration page.
- Enter a Description with any additional context or instructions for registrants.
- Use the Active toggle to control whether the form is currently accepting registrations. Inactive forms are hidden from registrants but preserved for reference.
- Tap Save to create the form. You can then configure required fields, custom fields, linked events, and recipients.
Form Settings
| Setting | Description |
|---|---|
| Title | The display name of the form, shown in emails and on the registration page |
| Description | Additional context shown to registrants below the title |
| Active / Inactive | Toggle to open or close the form for new registrations |
| Register for Series | When checked, all linked events are treated as a non-selectable schedule (package deal). When unchecked, registrants can pick individual events |
Sharing a Form Link
Each form has a unique registration URL. You can copy this link to share it directly (via text message, social media, or your church website) without sending a formal email invitation.
- On the Forms list, find the form you want to share.
- Tap the link icon next to the form name.
- The registration URL is copied to your clipboard. A toast notification confirms the copy.
/forms/{formId}. Anyone with this link can open the registration page, making it easy to share outside of email.
Required Fields Admin
Required fields ensure that essential information is collected from every registrant. When a person is missing a required field, their tile shows a red ! badge prompting them to fill it in.
Global Required Fields
The following fields can be individually toggled as required via checkboxes:
Date of Birth
Ensures age information is collected for all registrants.
Gender
Collects gender for room assignments, group placement, etc.
Allergies
Critical for events involving food or outdoor activities.
Ensures a contact email is on file for follow-up communication.
Phone
Collects a phone number for emergency contact or reminders.
Address
Collects a mailing address for the registrant.
Required Fields by Role
Different family roles may need different information. For example, you might require an email and phone number from the registrant but only need date of birth and allergies from children.
- In the Required Fields section, look for the By Role area below the global checkboxes.
- Each row specifies a Role (selected from a dropdown: Registrant, Spouse, or Child) and which fields are required for that role (via checkboxes).
- Tap + Add Row to add a new role-specific requirement. Select the role from the dropdown and check the fields that should be required for that role.
- Role-specific requirements override the global settings for people in that role. For example, if "Email" is not globally required but is required for the Registrant role, only the registrant must provide an email.
Custom Fields Builder Admin
Custom fields let you add questions beyond the standard required fields. Build any combination of input types to collect the exact information you need for your event.
Adding a Custom Field
- In the form builder, scroll to the Custom Fields section.
- Tap + Add Field to create a new row.
- Enter a Label for the field — this is the question text registrants will see (e.g., "T-Shirt Size", "Dietary Restrictions", "Emergency Contact Name").
- Select a Type from the dropdown. Each type has different sub-options (see table below).
- Configure type-specific sub-options (e.g., add dropdown choices, set slider labels).
- Check the Required checkbox if registrants must answer this question to submit the form. Note: display-only types (Header, Info Text, White Space) do not have a Required option.
Field Types and Sub-Options
| Type | Sub-Options | Required? |
|---|---|---|
| Text | Display mode (single-line or multi-line), text size | Yes |
| Dropdown | List of selectable options (add/remove/reorder) | Yes |
| Checkbox | Single toggle or multiple-choice options | Yes |
| Radio | List of mutually exclusive options | Yes |
| Slider | Left label (min), right label (max), and scale range | Yes |
| Number Stepper | Min/max value range, step increment | Yes |
| Header | None — displays as a bold section heading | No |
| Info Text | Display mode (normal or small text), text size | No |
| White Space | None — adds vertical spacing between fields | No |
Reordering Fields
Custom fields can be reordered by dragging. Grab the drag handle on the left side of any field row and drag it to a new position. The order you set is the order registrants see the questions.
Linked Events Admin
Forms are connected to one or more events. Linked events determine what registrants are signing up for and appear in invitation emails as the event schedule.
Linking Events to a Form
- In the form builder, scroll to the Linked Events section.
- Use the search field to find future events by name. Only events with future dates appear in the search results.
- Tap an event from the search results to link it to the form. It appears in the linked events list below.
- Repeat to add additional events. For a multi-session series (e.g., a 5-week study), link all sessions.
Unlinking Events
- In the Linked Events list, find the event you want to remove.
- Tap the remove button next to the event name.
- The event is unlinked immediately. Existing registrations for that event are not affected.
Recipients & Invitations Admin
The Recipients section controls who receives an email invitation for the form. You can add people individually or in bulk from a church group.
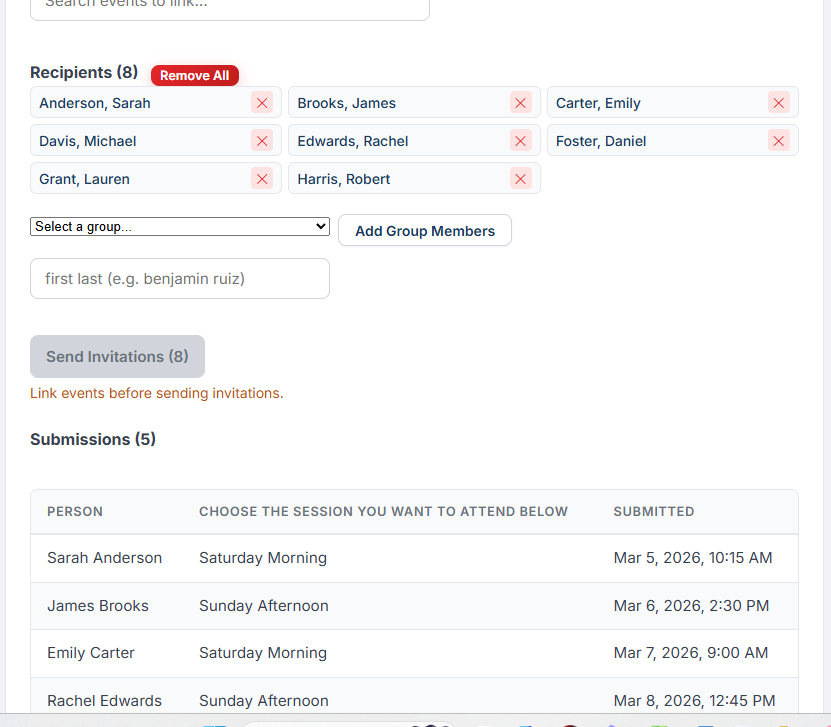
The Recipients & Submissions view — recipient grid with group selector and submission responses below.
Recipients Grid
Recipients are displayed in a 4-column grid showing each person's name. This gives you an at-a-glance view of everyone who will receive (or has received) an invitation.
Adding Recipients
- In the Recipients section, choose how to add people:
- From a Church Group: Select a church group from the dropdown. All members of that group are added to the recipient list at once.
- By Person Search: Use the search field to find individuals by name. Tap a person to add them to the recipient list.
- The grid updates immediately to show the new recipients.
Removing Recipients
To clear the entire recipient list, tap the Remove All button above the grid. This removes all recipients from the form but does not affect previously sent invitations.
Sending Invitations
- After adding recipients, tap Send Invitations.
- The system sends an email to each recipient with the form title, the linked event schedule, and a Register Now link.
- After sending completes, a summary appears showing the number of emails sent and skipped (recipients without an email address on file are skipped).
Submissions Admin
The Submissions section shows all responses collected from registrants. This is where you review who registered, which events they selected, and how they answered custom fields.
Viewing Submissions
Submissions are displayed as a table with one row per person per custom field response. This flat format makes it easy to scan through all answers or export the data.
| Column | Description |
|---|---|
| Person Name | The full name of the person who was registered |
| Custom Field Label | The question that was answered |
| Response | The registrant's answer to that question |