The Communications module lets authorized staff send email and SMS messages to church members directly from the platform — no need to switch to a separate email or texting tool. Target specific groups, events, or individual people, preview your recipient list before sending, and track delivery status afterward.
What It Does
Communications provides a single place to compose and send messages to your congregation. Key capabilities include:
Two Channels
Send via email or SMS text message. Toggle between channels with one click.
Smart Recipient Filters
Target all members, a specific church group, small group, event registrants, or hand-picked individuals.
Preview Before Sending
See the exact list of recipients and their contact info before committing to send.
Delivery Tracking
Message history shows sent/failed counts and per-recipient delivery status.
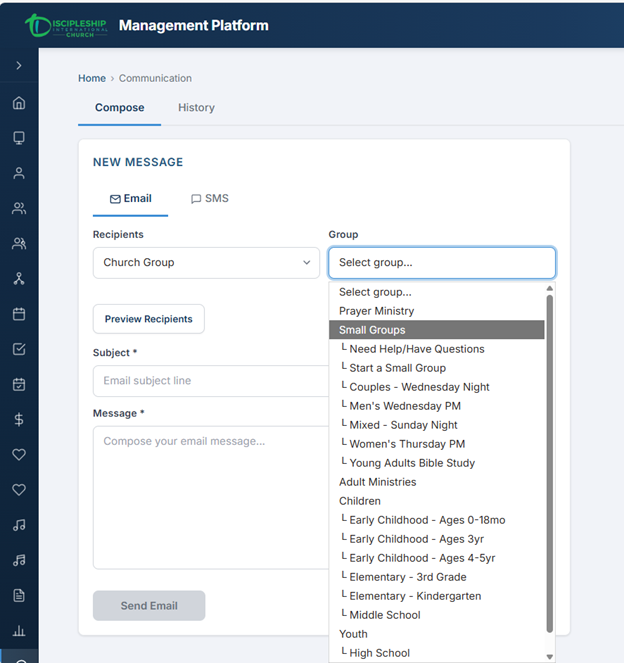
Communications page — Compose tab with email channel, recipient filter, subject, and message body.
Email & SMS
The compose form lets you choose between two delivery channels:
| Channel | How It Works | Best For |
|---|---|---|
| Sent via the platform's configured email service (Gmail SMTP). Includes a subject line and full message body. | Detailed announcements, event info, newsletters, anything with links or formatting | |
| SMS | Sent via Twilio using your church's approved toll-free number. Character counter shows 0/160 per segment. | Urgent reminders, short notices, time-sensitive updates (e.g., "Service cancelled due to weather") |
Compose a Message Admin
To send a new message, navigate to Communication in the sidebar and use the Compose tab.
- Select the channel — click Email or SMS at the top of the compose form.
- Choose your recipients using the filter dropdown (see Recipient Filters below).
- For email: enter a subject line. For SMS: the subject field is hidden.
- Write your message in the body textarea.
- Click Preview Recipients to see exactly who will receive the message.
- Click Send and confirm in the confirmation dialog.
Compose tab — email mode with subject line, message body, and recipient filter.
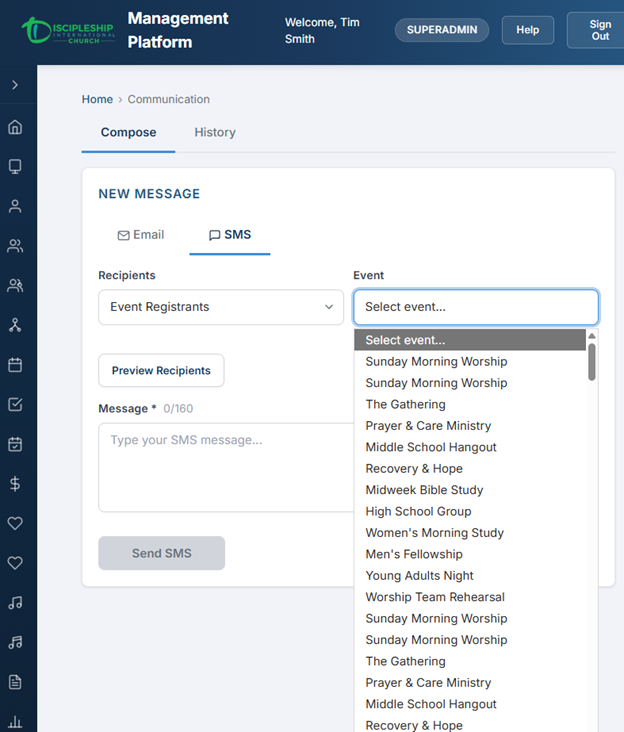
Compose tab — SMS mode with character counter (0/160) and group recipient filter.
Recipient Filters Admin
Five filter types let you target exactly who should receive your message:
| Filter Type | Description |
|---|---|
| All Members | Every person in the system who has an email address (for email) or a verified phone number with SMS opt-in (for SMS). |
| Church Group | Members of a specific department or ministry group. Select the group from a dropdown. |
| Small Group | Members of a specific small group. Select the group from a dropdown. |
| Event Registrants | People registered for a specific event. Select the event from a dropdown. |
| Individual | Hand-pick specific people by searching their name. Add multiple people as chips. |
Preview & Send Admin
Before sending, the platform shows you a summary of your message:
- Recipient count — how many people will receive the message
- Recipient table — each person's name and email address or phone number
- Channel — email or SMS
When you click Send, a confirmation dialog appears asking you to verify. Once confirmed, the message is dispatched immediately. You'll see a success message when all messages have been queued.
Viewing Message History
The History tab shows all messages that have been sent or drafted, newest first. Each row displays:
| Column | Description |
|---|---|
| Date | When the message was sent |
| Channel | Email or SMS icon |
| Subject / Preview | The email subject line, or a preview of the SMS message text |
| Recipients | Total number of people the message was sent to |
| Status | Current delivery status (Draft, Sending, Sent, Completed, Failed) |
Click any row to expand the detail view, which shows the full message body, sender info, and a per-recipient delivery table.
Delivery Status
Each message and each individual recipient has a delivery status:
| Status | Meaning |
|---|---|
| Draft | Message saved but not yet sent. Can be deleted. |
| Sending | Message is actively being dispatched to recipients. |
| Sent | Message delivered to the email/SMS provider. |
| Completed | All recipients have been processed. |
| Failed | Delivery failed for this recipient. Error details shown in the expanded view. |
| Bounced | Email bounced back (invalid address, full mailbox, etc.). |
The expanded detail view shows a breakdown: how many were sent successfully, how many failed, and the specific error for each failed delivery.
Who Can Access What
Access to the Communications module is controlled by two permissions:
| Permission | What It Grants |
|---|---|
communications.view | View the Communication page and message history |
communications.manage | Compose and send new messages (email and SMS) |
The Communications module must also be enabled via the Feature Modules admin page. When disabled, the sidebar item and route are hidden.
Setup & Requirements Admin
The Communications module requires the following to be configured:
For Email
- Gmail SMTP credentials in
Emailsection of application settings (same as password reset emails) - If email is already working for password resets, no additional setup is needed
For SMS
- Twilio account with an approved toll-free number for sending broadcast messages
Sms:AccountSid,Sms:AuthToken, andSms:FromNumberconfigured in application settings- Recipients must have verified phone numbers with SMS opt-in
Enabling the Module
- Navigate to Feature Modules in the Configuration section of the sidebar (SUPERADMIN only).
- Toggle the Communications module to Enabled.
- Assign the
communications.viewandcommunications.managepermissions to appropriate roles via the Permissions admin page.